Arbitrary Cut vs Single-LED Cut LED Strips: Which Cutting Technology Is Right for Your Project?
- 2026-09-09 17:16
- /
- Arraystar
Quick Answer
Arbitrary-cut (also called dot-free or cut-anywhere) LED strips use COB (Chip-on-Board) technology with a continuous line of tiny LED chips, allowing you to cut at ANY point along the strip without leaving dark spots or dead sections—ideal for precise custom lengths, corner installations, and seamless lighting. Single-LED-cut (also called per-LED cut or standard cut) SMD strips have designated cut points between every LED or every group of LEDs, typically every 2.5cm-10cm, and cutting between cut points damages the circuit and creates dead sections—better for standard-length runs and budget projects. Choose arbitrary-cut COB strips when you need exact custom lengths, seamless dot-free illumination, or frequent cuts at non-standard intervals; choose single-LED-cut SMD strips when standard cut intervals are acceptable, budget is a priority, or you need replaceable individual LED sections. Arbitrary-cut strips cost 20-50% more but offer unmatched flexibility and visual quality.
📑 Table of Contents
- What Is Arbitrary-Cut LED Strip Technology?
- What Is Single-LED-Cut LED Strip Technology?
- Technical Comparison: How They Work Differently
- Cutting and Connection Methods Compared
- Application Scenarios: When to Choose Each
- Pros and Cons: A Detailed Comparison
- How to Choose the Right Cutting Technology for Your Project
- Common Mistakes and Troubleshooting
What Is Arbitrary-Cut LED Strip Technology?
Arbitrary-cut LED strips, also known as 'cut-anywhere,' 'dot-free cut,' or 'continuous cut' strips, represent the latest advancement in LED strip flexibility. Unlike traditional strips that have designated cut points at fixed intervals, arbitrary-cut strips can be cut at virtually any point along their entire length without damaging the circuit or creating dark spots. How it works: Arbitrary-cut technology is made possible by COB (Chip-on-Board) packaging, where hundreds of tiny LED chips are mounted directly onto a continuous flexible PCB substrate and coated with a uniform phosphor layer. Because the LEDs are not discrete packages but rather a continuous array of micro-chips, the electrical circuit is distributed evenly across the entire strip length. This means that cutting the strip at any point simply truncates the continuous circuit—there are no individual LED units to damage, and the remaining section continues to function perfectly. Key characteristics: 1) No designated cut points—cut anywhere with sharp scissors. 2) No dark spots after cutting—uniform light output right up to the cut edge. 3) Dot-free illumination—no visible individual LED dots, even at close range. 4) Typically available in 5mm, 8mm, 10mm, and 12mm PCB widths. 5) Voltage options: 12V, 24V, and 48V (higher voltage allows longer continuous runs). 6) CRI options: 80, 90, 95+, with R9 values ranging from 50 to 95+. 7) Density: 320, 480, 576, 768, 840, or 1024 LEDs per meter. The arbitrary-cut advantage is most apparent in applications where exact custom lengths are required—such as fitting strips to custom-sized shelves, mirror frames, sign letters, or irregular architectural features. With traditional strips, you would have to round up or down to the nearest cut point, potentially leaving gaps or excess length. With arbitrary-cut strips, you get a perfect fit every time.
What Is Single-LED-Cut LED Strip Technology?
Single-LED-cut LED strips, also known as 'per-LED cut,' 'individual LED cut,' or 'standard cut' strips, are the traditional and most common type of LED strip. These strips use SMD (Surface-Mount Device) LEDs that are soldered onto the PCB at regular intervals, with designated cut points located between each LED (or between each group of LEDs). How it works: In a single-LED-cut strip, each individual LED (or small group of LEDs) forms an independent electrical circuit segment. The PCB has copper traces that connect the LEDs in series-parallel configuration. Designated cut points—marked with a scissors icon or a dashed line—are located at the gaps between LED segments, where the copper traces are intentionally narrowed to allow clean cutting. Cutting at a designated cut point severs the connection between two LED segments, and both resulting sections continue to function independently. However, cutting anywhere OTHER than at a designated cut point will sever the copper trace in the middle of an LED circuit segment, damaging one or more LEDs and creating a dead (non-lighting) section at the cut end. Cut point spacing varies by LED density: - 30 LEDs/m: cut every 10cm (approximately every 3 LEDs) - 60 LEDs/m: cut every 5cm (approximately every 3 LEDs) - 120 LEDs/m: cut every 2.5cm (approximately every 3 LEDs) - 240 LEDs/m: cut every 1.25cm (approximately every 3 LEDs) - Single-LED-cut 60 LEDs/m: cut every 1.67cm (every individual LED) True 'single-LED-cut' strips have a cut point after EVERY individual LED, rather than every 3 LEDs. This is achieved by designing the PCB circuit so that each LED is its own parallel circuit segment. Single-LED-cut strips offer finer adjustment than standard 3-LED-cut strips, but still require cutting at designated points—you cannot cut between cut points without damaging LEDs. Key characteristics: 1) Designated cut points at fixed intervals (marked with scissors icon). 2) Cutting between cut points damages LEDs and creates dead sections. 3) Visible individual LED dots (unless using a diffuser or lens). 4) Wide range of options: SMD 2835, 3014, 3528, 5050, 5630, 5730, etc. 5) Voltage: 12V (most common), 24V, 5V. 6) CRI: 70-98+ available. 7) Price: generally more affordable than COB arbitrary-cut strips. Single-LED-cut strips remain the most popular choice for general lighting applications where standard cut intervals are acceptable and budget is a consideration.
🎥 LED Strip Light Installation for Beginners
Technical Comparison: How They Work Differently
Understanding the technical differences between arbitrary-cut and single-LED-cut strips requires examining the PCB design, LED packaging, and circuit architecture: PCB Design: Arbitrary-cut COB strips use a continuous flexible PCB with a uniform copper layer that distributes power across the entire strip. There are no individual circuit segments—the entire strip is one continuous parallel circuit. Cutting at any point simply removes a section of the continuous circuit, and the remaining section continues to draw power from the connection end. Single-LED-cut SMD strips use a PCB with discrete copper traces that form individual circuit segments (usually 3 LEDs in series per segment, or 1 LED per segment for true single-LED-cut). The cut points are located at the gaps between segments, where the parallel connection is made. Cutting in the middle of a segment severs the series connection, causing the LEDs in that segment to fail. LED Packaging: Arbitrary-cut strips use COB (Chip-on-Board) technology, where hundreds of tiny LED dies (chips) are directly bonded to the PCB substrate and covered with a continuous phosphor coating. There are no individual LED packages—the entire strip is one continuous light-emitting surface. This is what enables dot-free illumination and arbitrary cutting. Single-LED-cut strips use SMD (Surface-Mount Device) LEDs, which are pre-packaged LED units with a lens, phosphor, and internal bonding. Each SMD LED is a discrete component soldered onto the PCB. The individual LED packages create visible 'dots' of light, and the discrete nature of the components requires designated cut points between them. Circuit Architecture: Arbitrary-cut COB strips typically use a parallel circuit architecture where every section of the strip draws current independently from the main power bus. This means that cutting the strip does not break any series circuit—each micro-section of the COB array is independently powered. The tradeoff is higher current draw (COB strips draw more current per meter than SMD strips), requiring thicker copper PCB and higher-current power supplies. Single-LED-cut SMD strips use a series-parallel circuit: 3 LEDs in series form one segment, and multiple segments are connected in parallel. This design reduces current draw (each segment drops 3x the LED forward voltage), but means that cutting within a segment breaks the series connection for that segment. True single-LED-cut strips use a pure parallel design (1 LED per segment), allowing cut points after every LED, but at the cost of higher current draw. Heat Dissipation: Arbitrary-cut COB strips pack more LEDs into a smaller area, generating more heat per meter. This requires thicker copper PCB (2oz-3oz) and often aluminum channels for proper heat dissipation. Without adequate heat sinking, COB strips may experience accelerated lumen depreciation and color shift. Single-LED-cut SMD strips have fewer LEDs per meter and lower heat density, making them more forgiving in terms of heat dissipation. They can often be installed directly on surfaces without aluminum channels, although channels still improve lifespan and light quality. Summary: The fundamental difference is that arbitrary-cut COB strips use a continuous parallel circuit with micro-LED chips, while single-LED-cut SMD strips use discrete series-parallel segments with packaged LEDs. This architectural difference determines everything from cut flexibility to light quality to heat management.
Cutting and Connection Methods Compared
The process of cutting and connecting strips differs significantly between the two technologies: Arbitrary-Cut COB Strips: Cutting: 1) Measure the desired length and mark the cut point with a pencil or tape. 2) Use sharp scissors or a utility knife to cut straight across the strip at the marked point. No need to align with designated cut points—cut anywhere. 3) The cut edge will have exposed copper pads on the + and - sides (or on both ends for 2-pad design). 4) No dead spots—the strip lights uniformly right up to the cut edge. Connecting: 1) Solderless connectors: COB strips require specialized connectors that clamp onto the continuous copper pads. Standard SMD strip connectors may not work because the pad layout is different. Look for 'COB strip connectors' or 'arbitrary-cut connectors.' 2) Soldering: Soldering to COB strip pads requires a fine-tip iron and careful technique. The copper pads are small and close together. Pre-tin both the pad and the wire, then heat briefly (2-3 seconds) to join. Avoid excessive heat—COB chips are heat-sensitive. 3) Power injection: For runs longer than 5m (12V) or 10m (24V), inject power at both ends or at intermediate points to prevent voltage drop. COB strips draw more current, so power injection is especially important. 4) Corner connections: For 90-degree corners, cut the strip and use a corner connector or solder a short wire bridge. Arbitrary-cut strips can be cut exactly at the corner point for a seamless fit. Single-LED-Cut SMD Strips: Cutting: 1) Locate the designated cut point (marked with scissors icon or dashed line) closest to your desired length. 2) Measure from the end of the strip to the nearest valid cut point. 3) Cut straight across at the cut point using sharp scissors. Ensure you cut through the center of the copper contact pads. 4) IMPORTANT: If you cut between cut points, the LEDs in that segment will be damaged and will not light. You must cut at designated points only. Connecting: 1) Solderless connectors: Standard SMD strip connectors are widely available and easy to use. Simply insert the strip end into the connector and close the clamp. Ensure the copper pads align with the connector pins. 2) Soldering: Soldering to SMD strip pads is straightforward—each cut point has clearly marked + and - copper pads. Tin the pads, tin the wire, then heat to join. SMD pads are larger and more robust than COB pads, making soldering easier for beginners. 3) Power injection: Standard 3-LED-cut strips have power injection points at every cut point. Simply solder power wires to the + and - pads at any cut point. 4) Corner connections: Pre-made corner connectors (L-shape, T-shape, X-shape) are widely available for SMD strips. Simply cut at the nearest cut point and connect with a corner connector. Key Differences Summary: - Arbitrary-cut: cut anywhere, no dead spots, specialized connectors, more delicate soldering. - Single-LED-cut: cut only at designated points, potential dead spots if cut wrong, widely available connectors, easier soldering. - Arbitrary-cut offers more precise length matching; single-LED-cut offers easier connection and repair. - For beginners or quick installations, single-LED-cut SMD strips are more forgiving in terms of connection. For precision custom projects, arbitrary-cut COB strips offer unmatched flexibility.
Application Scenarios: When to Choose Each
Choosing between arbitrary-cut and single-LED-cut strips depends on your specific application requirements: Best for Arbitrary-Cut COB Strips: 1) Custom-length installations: When you need strips cut to exact, non-standard lengths—such as custom shelving, bespoke furniture, custom mirror frames, or unique architectural features. Arbitrary-cut ensures a perfect fit without gaps or excess. 2) Seamless dot-free lighting: When the strip will be visible at close range or reflected in glossy surfaces—such as under-cabinet lighting in modern kitchens, cove lighting in luxury homes, or display case lighting. COB's dot-free output creates a premium, professional appearance. 3) Frequent or irregular cuts: When the installation requires many cuts at irregular intervals—such as sign lettering, complex geometric patterns, or decorative lighting with many short segments. Arbitrary-cut eliminates the need to plan around fixed cut points. 4) Corner and angle installations: When strips need to navigate sharp corners, curves, or irregular shapes—such as ceiling cornices, stair nosings, or curved furniture. Arbitrary-cut allows cutting exactly at the corner point for a seamless transition. 5) High-end residential and commercial: When visual quality is a top priority—such as luxury homes, high-end retail, hotels, restaurants, and galleries. The dot-free uniform light of COB strips creates a premium ambiance that SMD strips cannot match. 6) Low-profile installations: When space is limited and a thin, uniform light source is needed—such as in tight gaps, under floating shelves, or behind thin panels. COB strips are available in 5mm width for ultra-slim installations. Best for Single-LED-Cut SMD Strips: 1) Standard-length runs: When the installation uses standard lengths that align with cut point intervals—such as 5m reels for under-cabinet lighting, 10m runs for cove lighting, or standard shelf lengths. No need for arbitrary cutting precision. 2) Budget-conscious projects: When cost is a primary concern—such as large-scale commercial installations, rental properties, or temporary event lighting. SMD strips are significantly cheaper than COB strips, and the savings multiply over long runs. 3) DIY and beginner installations: When the installer is inexperienced or the project is a quick DIY job—such as bedroom accent lighting, TV backlighting, or basic shelf lighting. SMD strips have widely available connectors, clearer instructions, and more forgiving connection methods. 4) Replaceable and repairable installations: When individual sections may need replacement—such as in commercial displays where sections can be damaged, or in rental properties where tenants may damage strips. SMD strips can be cut at any cut point and a new section spliced in, replacing only the damaged portion. 5) RGB and color-changing applications: When dynamic color changing is needed—such as accent lighting, party lighting, or smart home RGB setups. SMD RGB strips (5050, 2835 RGB) are widely available, affordable, and have a mature ecosystem of controllers and apps. COB RGB strips are newer, more expensive, and have fewer controller options. 6) High-voltage and long-run applications: When very long continuous runs are needed—such as perimeter lighting of large buildings, highway guardrail lighting, or large-scale architectural lighting. 110V/220V high-voltage SMD strips can run up to 50m-100m from a single power source, while low-voltage COB strips require power injection every 5-10m. 7) Outdoor and harsh environments: When the strip will be exposed to water, dust, UV, or extreme temperatures—such as outdoor facade lighting, pool lighting, or industrial lighting. SMD strips with silicone tube or epoxy coating (IP67/IP68) have a long track record of outdoor durability. COB outdoor strips are newer and may have less proven long-term reliability. The Bottom Line: Choose arbitrary-cut COB strips when precision, visual quality, and seamless appearance are worth the premium. Choose single-LED-cut SMD strips when budget, ease of use, and standard lengths are the priorities. Many professional installations use both—COB for visible, high-end areas and SMD for hidden, functional, or budget areas.
Pros and Cons: A Detailed Comparison
Arbitrary-Cut COB Strips - Pros: 1) Unmatched cutting flexibility—cut anywhere at any length. 2) No dead spots after cutting—uniform light to the edge. 3) Dot-free illumination—no visible LED dots, premium appearance. 4) High brightness—480-1024 LEDs/m, up to 2000+ lm/m. 5) Wide beam angle—180-degree uniform light distribution. 6) Low glare—diffused light is easier on the eyes. 7) High CRI options—90, 95, 98+ available with excellent R9. 8) Thin profile—5mm width options for ultra-slim installations. 9) Color consistency—better binning control, uniform color across the strip. Arbitrary-Cut COB Strips - Cons: 1) Higher cost—20-50% more expensive than comparable SMD strips. 2) Higher current draw—requires thicker wire and higher-current power supplies. 3) More heat generation—requires aluminum channels for long runs or high brightness. 4) Specialized connectors—COB-specific connectors are less widely available and more expensive. 5) More delicate soldering—smaller pads require finer technique and a steady hand. 6) Limited RGB options—COB RGB strips are newer, more expensive, and have fewer controller options. 7) Voltage drop—COB strips draw more current, so voltage drop is more pronounced; power injection needed more frequently. 8) Less proven long-term reliability—COB technology is newer; long-term (5+ year) field data is more limited than SMD. Single-LED-Cut SMD Strips - Pros: 1) Lower cost—significantly cheaper than COB, especially for long runs. 2) Widely available—every LED manufacturer makes SMD strips; easy to source globally. 3) Mature ecosystem—controllers, connectors, dimmers, sensors, and accessories are widely available and affordable. 4) Easy connection—standard connectors and larger pads make connection and repair straightforward. 5) Easy soldering—larger, more robust copper pads are forgiving for beginners. 6) RGB options—mature RGB/RGBW/RGBCCT ecosystem with hundreds of controller and app options. 7) High-voltage options—110V/220V SMD strips can run 50-100m from one power source. 8) Proven reliability—SMD technology has 20+ years of field data; long-term performance is well understood. 9) Easy repair—individual sections can be cut out and replaced without replacing the entire strip. Single-LED-Cut SMD Strips - Cons: 1) Fixed cut points—must cut at designated intervals; cannot cut to exact custom lengths. 2) Dead spots—cutting between cut points damages LEDs and creates non-lighting sections. 3) Visible dots—individual LED packages create visible dots, especially at close range or on reflective surfaces. 4) Lower maximum density—SMD strips max out around 240-300 LEDs/m, while COB can reach 1024 LEDs/m. 5) Narrower beam angle—SMD LEDs typically have 120-160 degree beam angle, creating more directional light. 6) Color consistency—cheaper SMD strips may have noticeable color variation between LEDs or between batches. 7) Glare—individual LED dots can cause glare, especially without diffusers. 8) Thicker profile—most SMD strips are 8mm+ wide; ultra-slim 5mm SMD strips are rare and low-density. Cost Comparison Example (5m run, 4000K, CRI 90, 1200 lm/m): - Arbitrary-cut COB strip (480 LEDs/m, 10mm): $8-15/m = $40-75 for 5m - Single-LED-cut SMD strip (120 LEDs/m, 10mm): $3-8/m = $15-40 for 5m - Premium SMD strip (240 LEDs/m, 10mm): $5-10/m = $25-50 for 5m The cost premium for COB is 20-50%, which may be justified for visible, high-end installations but harder to justify for hidden or functional lighting.
How to Choose the Right Cutting Technology for Your Project
Choosing between arbitrary-cut and single-LED-cut strips requires evaluating your project's specific requirements across several dimensions: Step 1: Evaluate your length precision needs. Ask: Do I need strips cut to exact, non-standard lengths? If YES (custom furniture, bespoke shelving, sign lettering, irregular shapes): Choose arbitrary-cut COB strips. The ability to cut to the exact millimeter ensures a perfect fit without gaps or excess. If NO (standard 1m/2m/5m lengths, runs that align with cut intervals): Single-LED-cut SMD strips are sufficient and more cost-effective. Step 2: Evaluate visibility requirements. Ask: Will the strip be visible at close range or reflected in glossy surfaces? If YES (under-cabinet in modern kitchen, cove lighting in luxury home, display case, mirror surround): Choose arbitrary-cut COB strips. The dot-free uniform light creates a premium appearance that SMD strips cannot match. Visible LED dots look cheap and unprofessional in high-end settings. If NO (strip hidden in a channel, behind a diffuser, in a cove with indirect light, or in a utility area): Single-LED-cut SMD strips work fine. The diffuser or channel will hide the dots, and the cost savings are significant. Step 3: Evaluate your budget. Ask: Is cost a primary constraint for this project? If YES (large-scale commercial, rental property, temporary installation, budget DIY): Choose single-LED-cut SMD strips. The 20-50% cost savings multiply over long runs, and SMD strips offer excellent performance for the price. If NO (high-end residential, luxury commercial, custom design project where quality is paramount): Arbitrary-cut COB strips are worth the premium. The visual quality and flexibility will elevate the entire project. Step 4: Evaluate installation complexity. Ask: Who is installing the strips, and how complex is the installation? If BEGINNER/DIY (homeowner installing bedroom accent lighting, TV backlight, basic shelf lighting): Choose single-LED-cut SMD strips. Widely available connectors, clear instructions, and forgiving soldering make SMD strips ideal for beginners. If PROFESSIONAL/CUSTOM (electrician, lighting designer, custom installer): Arbitrary-cut COB strips are manageable for professionals. The specialized connectors and more delicate soldering require experience, but the results are superior. Step 5: Evaluate color and control needs. Ask: Do I need RGB color changing or smart control? If YES (dynamic accent lighting, party mode, smart home automation, color-changing scenes): Single-LED-cut SMD RGB strips are the mature, affordable choice. The RGB ecosystem (controllers, apps, voice control, scenes) is far more developed for SMD than COB. If NO (single white or tunable white only): Both technologies work well. COB offers better color consistency and higher CRI; SMD offers more tunable white options at lower cost. Step 6: Evaluate run length and power. Ask: How long is the continuous run, and how is power supplied? If SHORT RUNS (<5m for 12V, <10m for 24V) with easy power access: Both technologies work. COB may require power injection sooner due to higher current draw. If LONG RUNS (>10m) or difficult power access: Single-LED-cut SMD strips, especially high-voltage (110V/220V) options, are better. High-voltage SMD strips can run 50-100m from a single power source, while COB strips require frequent power injection. Step 7: Evaluate environment. Ask: Will the strips be used indoors or outdoors, and in what conditions? If INDOOR, climate-controlled: Both technologies work well. COB offers better visual quality; SMD offers lower cost. If OUTDOOR or harsh environment (water, dust, UV, extreme temperatures): Single-LED-cut SMD strips with IP67/IP68 rating have a longer track record of outdoor durability. COB outdoor strips are newer and may have less proven long-term reliability. Final Decision Framework: - Choose ARBITRARY-CUT COB if: precision length + visible location + adequate budget + professional installation + single white color. - Choose SINGLE-LED-CUT SMD if: standard length + hidden/diffused + budget-conscious + DIY installation + RGB color changing + long runs + outdoor. - When in doubt for residential projects: Use COB for visible, high-impact areas (kitchen, living room, bathroom vanity) and SMD for hidden or functional areas (closet, garage, utility). - When in doubt for commercial projects: Use COB for customer-facing areas (retail floor, restaurant dining room, hotel lobby) and SMD for back-of-house (storage, kitchen, office). Remember: You don't have to choose one technology for the entire project. Many professional lighting designs mix COB and SMD strips, using each where its strengths are most valuable.
Common Mistakes and Troubleshooting
Arbitrary-Cut COB Strip Mistakes: 1) Using SMD connectors on COB strips: SMD strip connectors are designed for the larger, widely-spaced pads of SMD strips. COB strips have smaller, closer pads, and SMD connectors may not make proper contact, causing flickering or no light. Solution: Always use COB-specific connectors labeled for your strip width (5mm, 8mm, 10mm, 12mm). 2) Cutting with dull scissors: Dull scissors can crush the COB chip array at the cut edge, damaging the first few millimeters of LEDs. Solution: Use sharp, high-quality scissors or a utility knife with a fresh blade. Cut in one smooth motion. 3) Excessive heat during soldering: COB chips are more heat-sensitive than SMD packages. Applying heat for too long can delaminate the phosphor coating or damage the micro-chips. Solution: Use a fine-tip iron at 300-350°C, pre-tin pads and wires, and limit heating to 2-3 seconds per joint. 4) Ignoring power injection: COB strips draw more current per meter than SMD strips (often 2-3x more). Failing to inject power for runs over 5m (12V) or 10m (24V) causes severe voltage drop, with the far end appearing dim or yellow. Solution: Inject power at both ends for runs up to 10m, and at intermediate points (every 5m) for longer runs. Use 18AWG or thicker wire for power injection. 5) Installing without heat sinking: High-density COB strips (480+ LEDs/m) generate significant heat. Installing them directly on plastic, wood, or in enclosed spaces without ventilation causes overheating, accelerated lumen depreciation, and color shift. Solution: Use aluminum channels/profiles for all COB installations longer than 2m or brighter than 1000 lm/m. Ensure adequate ventilation. 6) Bending too sharply: COB strips have a continuous PCB that can crack if bent beyond the minimum bend radius (typically 3-5cm). Cracking the PCB breaks the circuit and creates dead sections. Solution: Observe the minimum bend radius specified by the manufacturer. For sharp corners, cut the strip and use a connector or wire bridge. Single-LED-Cut SMD Strip Mistakes: 1) Cutting between cut points: This is the most common SMD strip mistake. Cutting between designated cut points severs the copper trace in the middle of an LED segment, damaging 1-3 LEDs and creating a dead section at the cut end. Solution: Always cut at designated cut points (marked with scissors icon). Measure carefully and align your cut with the center of the cut point pads. If you accidentally cut in the wrong place, trim off the damaged section at the next valid cut point. 2) Reversing polarity: Connecting + to - and - to + prevents the strip from lighting up. While most strips are reverse-voltage tolerant (won't be damaged), it's a common cause of 'my strip doesn't work' frustration. Solution: Always verify polarity before connecting. Match + (red wire) to + and - (black/white wire) to -. For RGB strips, match R/G/B labels and common (+ or -). 3) Underpowering the strip: Using a power supply with insufficient wattage causes dimness, flickering, or the strip not lighting at all. A common mistake is calculating wattage as LED count × 0.2W without accounting for the actual strip wattage per meter. Solution: Check the manufacturer's wattage specification (W/m), multiply by total length, then add 20% headroom. For example, a 5m 14.4W/m strip needs 72W + 20% = 86.4W, so use a 100W power supply. 4) Using incandescent dimmers: Standard TRIAC dimmers designed for incandescent bulbs do not work well with LED strips, causing flickering, buzzing, or limited dimming range. Solution: Use dimmers specifically rated for LED loads (LED-rated TRIAC, 0-10V, PWM, or DALI). Ensure the dimmer's wattage rating covers the total strip wattage. 5) Ignoring voltage drop: Even SMD strips experience voltage drop on long runs. A 12V strip run beyond 5m will show noticeable brightness decrease at the far end. Solution: For runs over 5m (12V) or 10m (24V), inject power at both ends or at intermediate points. Alternatively, use 24V strips for longer runs (24V has half the current draw of 12V for the same wattage, reducing voltage drop). 6) Poor surface preparation: Failing to clean the mounting surface causes the 3M adhesive to fail, especially on vertical or overhead installations. Solution: Clean the surface with isopropyl alcohol (90%+) and a lint-free cloth. Allow to dry completely. For porous or difficult surfaces, use 3M Adhesive Promoter (Primer 94) or mounting clips. 7) Overstretching the strip: Pulling or stretching the strip during installation can crack the PCB or damage solder joints, causing intermittent connections or dead sections. Solution: Do not stretch the strip. Lay it gently on the surface, working in small sections. If the strip is too long, cut it to size rather than stretching it. Troubleshooting Quick Reference: - Strip doesn't light at all: Check power supply (plugged in? switched on?), polarity (+ to +?), fuse/circuit breaker, loose connector. - Strip is dim at one end: Voltage drop—inject power at the far end or use higher voltage strip. - Strip flickers: Loose connection, incompatible dimmer, underpowered power supply, or poor solder joint. - Section of strip doesn't light: Damaged LEDs from cutting between cut points, broken PCB trace, or bad solder joint at the start of the dead section. - Strip gets too hot: Insufficient heat sinking (use aluminum channel), overvoltage (check power supply voltage), or enclosed without ventilation. - Colors are wrong (RGB): Crossed R/G/B wires, faulty controller, or incorrect wiring (common anode vs common cathode). - Adhesive fails: Dirty surface, porous surface, cold installation temperature, or vertical/overhead without additional support.
🎥 DIY LED Strip Installation - Handyman Tutorial
Arbitrary-Cut vs Single-LED-Cut Product Recommendations
| Feature | Budget | Mid-Range | Premium COB |
|---|---|---|---|
| Price/m | $1-3 | $5-10 | $10-25 |
| LED Type | Generic | Brand 2835/5730 | COB/Cree/Nichia |
| Brightness | 300-600 lm/m | 600-1200 lm/m | 800-2000+ lm/m |
| CRI | 70-80 | 80-90 | 90-98+ |
| Copper PCB | 0.5-1oz | 1-2oz | 2-3oz |
| Lifespan | 10-20K hrs | 30-40K hrs | 50-60K+ hrs |
| Warranty | None/1yr | 2-3 yrs | 3-5 yrs |
Recommended Products
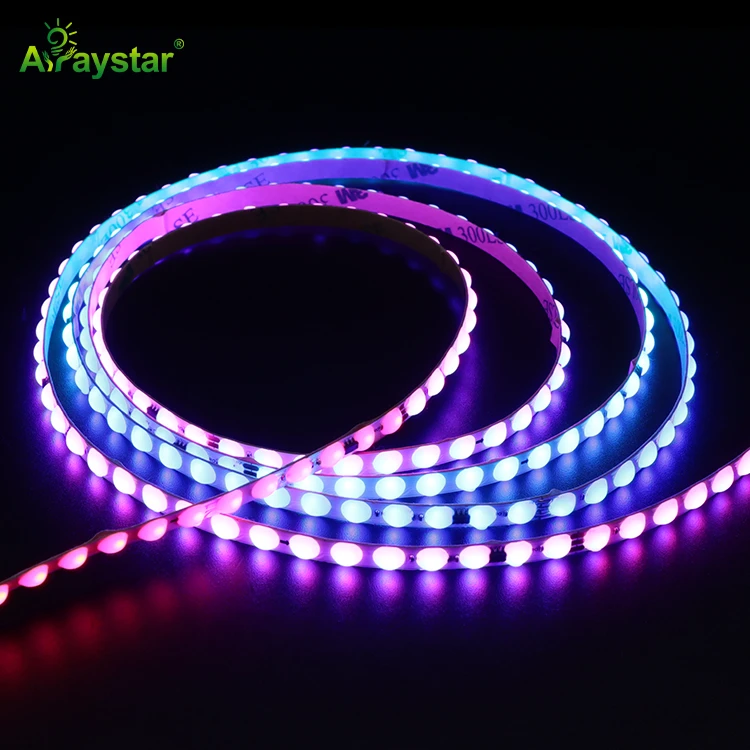
Explore our high-quality LED strip solutions.
Frequently Asked Questions
Find answers to common questions about LED strips.
❓ Do you offer custom specifications for ip68 full silicon extrusion led neon strip?
Yes, we provide comprehensive OEM/ODM services including custom PCB design, specific LED binning, custom color temperatures, private labeling, and custom packaging. MOQ applies for custom orders.
❓ What is the warranty on ip68 full silicon extrusion led neon strip?
All Arraystar LED ip68 full silicon extrusion led neon strip come with a standard 3-year warranty. Extended warranty options are available for commercial projects. Our products have a rated lifespan of 50,000+ hours.
❓ How do I choose between these ip68 full silicon extrusion led neon strip options?
Consider your project requirements: brightness needs, available space, budget, and installation environment. Arraystar LED offers free technical consultation to help you select the optimal solution.
❓ What certifications do your ip68 full silicon extrusion led neon strip have?
All products are CE, RoHS, and ERP certified. We also offer LM-80 tested LEDs, IEC reports, and can provide custom certification support for specific market requirements including UL, FCC, and PSE.
❓ Can I mix different types of ip68 full silicon extrusion led neon strip in one project?
Yes, but ensure they use the same voltage and compatible controllers. Different color temperatures or brightness levels can create interesting layered lighting effects when designed properly.
Conclusion
Arbitrary-cut (also called dot-free or cut-anywhere) LED strips use COB (Chip-on-Board) technology with a continuous line of tiny LED chips, allowing you to cut at ANY point along the strip without leaving dark spots or dead sections—ideal for precise custom lengths, corner installations, and seamless lighting. Single-LED-cut (also called per-LED cut or standard cut) SMD strips have designated cut points between every LED or every group of LEDs, typically every 2.5cm-10cm, and cutting between cut points damages the circuit and creates dead sections—better for standard-length runs and budget projects. Choose arbitrary-cut COB strips when you need exact custom lengths, seamless dot-free illumination, or frequent cuts at non-standard intervals; choose single-LED-cut SMD strips when standard cut intervals are acceptable, budget is a priority, or you need replaceable individual LED sections. Arbitrary-cut strips cost 20-50% more but offer unmatched flexibility and visual quality.
Ready to Start Your LED Strip Project?
Contact Arraystar LED for free technical consultation and custom quotes.
Get a Free Quote →About the Manufacturer
ArrayStar LED is a professional LED strip manufacturer in Shenzhen, China since 2010, serving 80+ countries. We support custom OEM/ODM projects (custom CCT, CRI, PCB, logo, packaging) and wholesale supply for distributors and contractors worldwide.