
LED Modules vs Strip: What to Use in Channel Letters and Lightboxes
- 2026-10-09 18:41
- /
- Arraystar LED
Channel letters and backlit sign cabinets are built around a specific light source: the injection LED module, a small serviceable block that packs into letter shapes and sign boxes for even, long-life illumination. Choosing between modules and strip, and spacing modules correctly, decides whether a sign face is uniformly lit or shows blotches, shadows and premature failures.
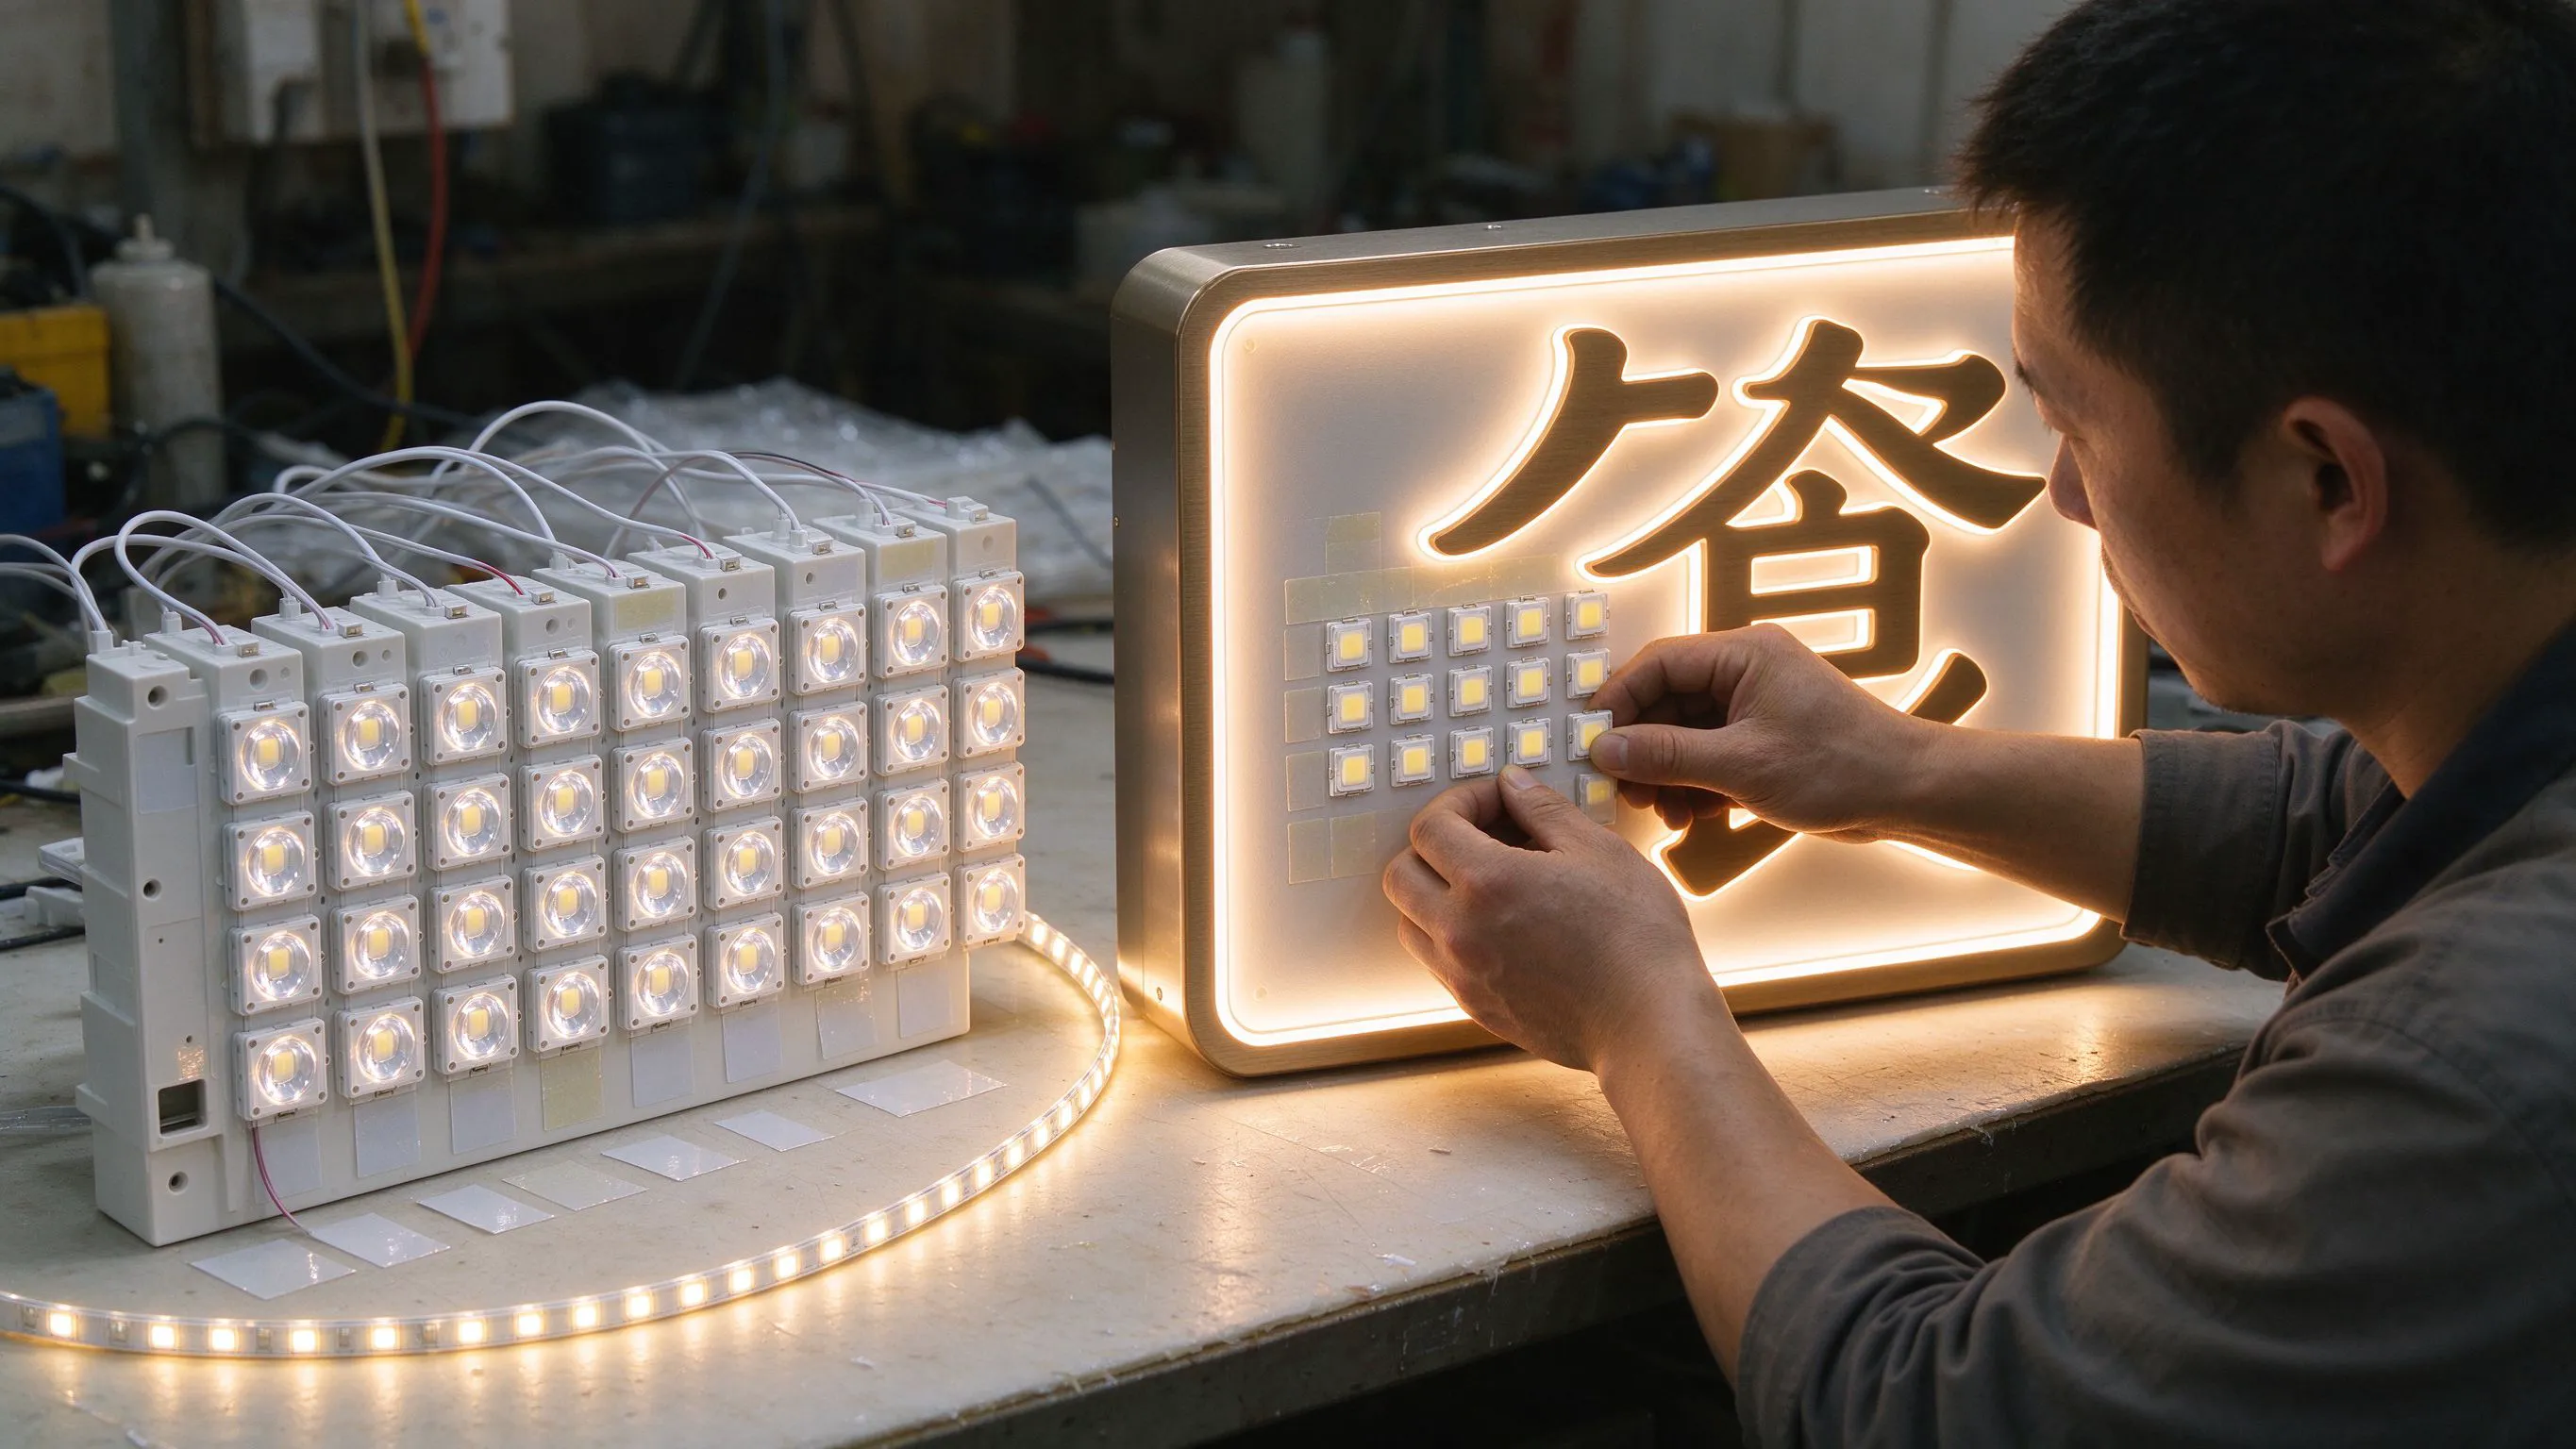
Why Signs Are Not Lit Like a Straight Cove
A channel letter is an irregular, often narrow enclosed shape, and a lightbox is a shallow cabinet behind a translucent face. Neither is a clean straight run, so continuous strip is awkward to pack into curves and corners, and when one section of strip fails inside a sealed letter it is difficult to repair.
The sign industry's answer is the LED module: a small sealed block of one or more LEDs on an injection body, with adhesive and wiring, designed to be placed individually in a grid that follows any letter or cabinet shape and to be serviced module by module.
What the 12V Two-LED Injection Module Does
- Small sealed blocks pack into any letter or cabinet shape.
- Two-LED 12V modules, the classic sign building block.
- Individual placement for even face illumination.
- Serviceable one module at a time inside the sign.
- Wide-angle output to blend across the diffuser face.
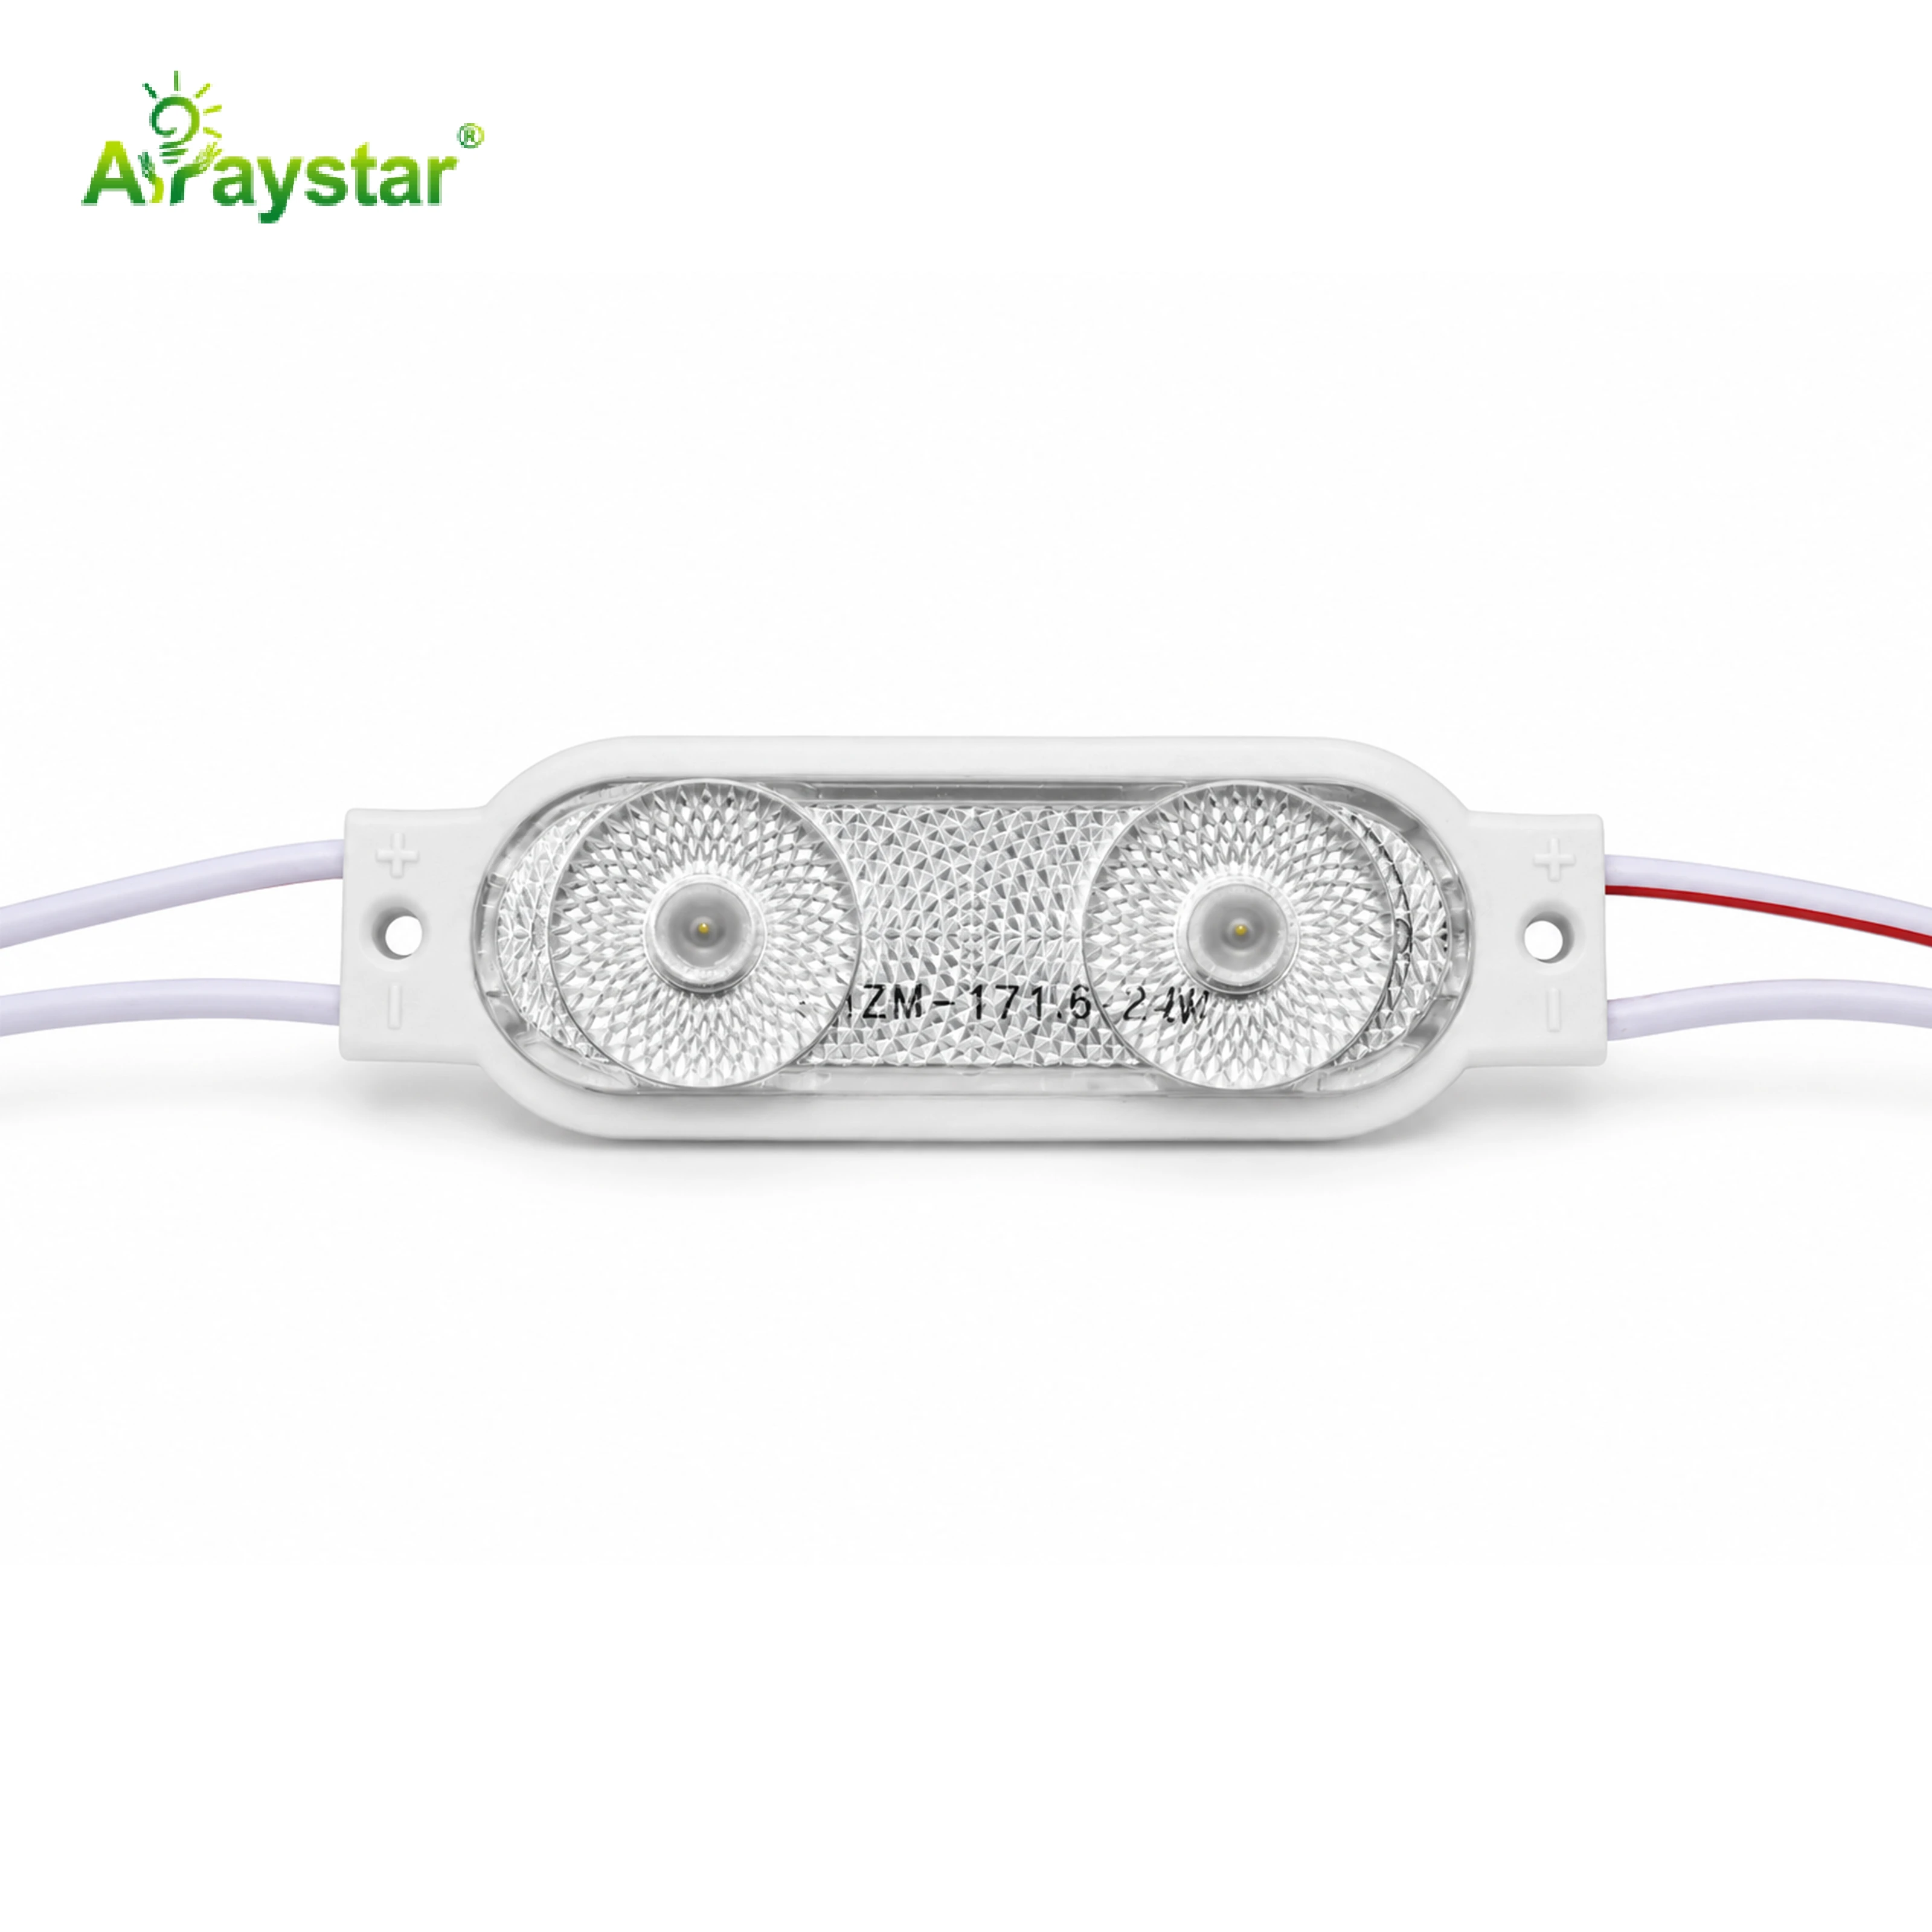
For channel letters and sign cabinets I use the 12V two-LED injection module. It is the serviceable, shape-flexible block the sign trade is built on.
LED Modules vs Continuous Strip in Signs
Sign cabinets and letters are the natural home of modules.
| Factor | Continuous strip | Injection modules |
|---|---|---|
| Shapes | Straight runs, awkward curves | Any letter/cabinet shape |
| Corner packing | Bends/folds poorly | Place individually |
| Evenness control | Fixed spacing | Grid tuned to the face |
| Service | Hard to repair sealed | Replace one module |
| Best for | Linear coves | Channel letters, lightboxes |
Where Sign Modules Are Specified
- Front-lit and halo-lit channel letters and logos.
- Backlit sign cabinets and lightbox faces.
- Route-cut and formed lettering of irregular shape.
- Shopfront fascia and reception signage.
- Double-sided and shallow sign boxes.
Module Spacing and the Throw Distance
Evenness in a sign is governed by module spacing versus the depth from module to face, the same blending principle as a lightbox. Too sparse and the face shows hot spots over each module with dark gaps; too dense wastes light and power. I follow a grid based on the module angle and cabinet depth, carry modules into the letter strokes' ends and serifs where darkness gathers, and test illumination on a sample face because the correct spacing changes with face material and depth.
- Set a grid from module angle and cabinet depth.
- Pack modules into stroke ends, corners and serifs.
- Avoid both hot spots and wasted over-density.
- Verify on the actual face material and depth.
Wiring, Voltage Drop and Reliability in Letters
Modules are chained in parallel runs on 12V, and I keep each run within the recommended module count to avoid voltage drop that dims the far end of a large letter or cabinet, feeding power from both ends on big signs. I use rated sign-grade power supplies, secure modules to clean surfaces, and allow ventilation because heat trapped in a sealed metal letter shortens LED life; the sealed injection body protects the LEDs, but the enclosure still has to manage temperature.
When Strip Is the Better Choice
I do not default to modules for everything. Long straight sign lightboxes with a uniform face can be lit efficiently by rigid bars or dense strip, and very thin letters may not physically fit a standard module, requiring slim strip. I choose modules for irregular letters, logos and serviceability, and continuous sources for straight, uniform panels, matching the light source to the sign geometry rather than forcing one product into every cabinet.
Specifying Channel Letter Lighting
Send the letter height and stroke width, cabinet depth, face material and colour, and whether letters are front-lit or halo-lit. I will confirm module choice, spacing grid, run layout and power supply for even illumination. We supply the 12V two-LED module and recommend lighting a sample letter or a section of the face at the true depth before producing the full sign, so spacing and evenness are proven rather than estimated.
Rebuilding a Halo-Lit Shopfront Logo
A restaurant's halo-lit shopfront logo had been built with a single run of flexible strip squeezed behind the formed acrylic letters, and after two years it showed the classic failures of the wrong light source in a sign: the halo around the letters was blotchy, bright directly behind each strip run and faint at the letter tips, one section had gone dark after a failed segment that could not be reached without removing the letters, and heat trapped against the wall had yellowed part of the acrylic.
- Remove the continuous strip and rebuild with 12V two-LED injection modules.
- Place modules in a grid tuned to the stand-off distance for an even halo.
- Pack extra modules into the letter tips and the swirl of the script.
- Feed parallel runs within module limits to keep the far letters bright.
- Leave the sign body ventilated and make modules reachable for service.
We rebuilt the logo using the 12V two-LED injection modules the sign trade relies on. The key was spacing the modules to the stand-off gap between the acrylic letters and the wall, because a halo is a backlight and its evenness depends on that blending distance; we set a grid on a sample letter first, checking the halo on the actual painted wall at night, and then carried extra modules out to the tips and into the flowing script strokes where the strip version had gone dark. Wiring the letters as parallel runs within the recommended module count kept every letter equally bright instead of fading across the sign, and we improved ventilation behind the letters and used a cooler-running arrangement to stop the heat that had yellowed the acrylic. Crucially, because each module is an independent sealed block on adhesive, a future failure means replacing one module rather than peeling out a sealed strip run, which is the serviceability the original sign lacked. The rebuilt logo now throws a smooth, consistent halo that outlines every letter and tip evenly with no blotching, and the night-time shopfront finally looks like the branded beacon it was designed to be. I use this job to explain to sign clients that the light source inside a letter is not interchangeable with strip from a cove: irregular formed shapes, blending distance, heat in a sealed body and the need to service individual points are exactly why injection modules exist, and why a few extra modules at the tips and a night-time sample are the difference between a halo that looks premium and one that looks patched together.
Recommended Products
Frequently Asked Questions
What is an injection LED module for signs?
It is a small sealed block, typically one or two LEDs on a 12V injection-moulded body with adhesive and wiring, placed individually inside channel letters or sign cabinets in a grid. Modules follow irregular letter shapes, blend wide-angle light across the face and can be replaced one at a time, which is why they are the standard sign backlight.
Why use modules instead of LED strip in channel letters?
Letters and logos are irregular, narrow and curved, where continuous strip bends and packs poorly, and a failed strip section inside a sealed letter is hard to repair. Modules place individually to follow any shape, allow the grid to be tuned for evenness and are serviced one block at a time, while strip suits long straight coves and uniform panels.
How far apart should sign modules be spaced?
Spacing depends on the module beam angle and the depth from module to face. Too sparse causes hot spots with dark gaps and too dense wastes light; set a grid for that depth, carry modules into stroke ends, corners and serifs that run dark, and verify evenness on a sample of the actual face material before building the full sign.
How do I stop voltage drop dimming large letters?
Modules chain in parallel 12V runs; keep each run within the recommended module count, feed large signs or cabinets from both ends, and use sign-grade power supplies sized with headroom. Secure modules to clean surfaces and allow some ventilation in sealed metal letters, since trapped heat shortens LED life even though the module body itself is sealed.
When is strip better than modules in a lightbox?
Long straight, uniform sign panels can be lit efficiently by rigid bars or dense strip, and very thin letters that cannot physically fit a standard module need slim strip. Choose modules for irregular letters, logos and serviceability, and continuous light sources for straight uniform cabinets, matching the source to the sign geometry rather than using one product everywhere.
Need help with your LED project?
Get factory-direct pricing, free samples and engineering support within 24 hours.
Email: info@arraystarled.com | Phone: +86-0755-2103-6746 | WhatsApp: 0086 1581 8514 077
Need to size your power supply? Use our LED Strip Power Calculator to find the right driver in seconds.







