
30-Degree Lens Linear Profiles for Directed Task Light
- 2026-10-09 18:41
- /
- Arraystar LED
Task lighting has to land on the work surface, not in the user's eyes, and a flat diffused channel often spills light wide and creates glare. A linear aluminium profile with a 30-degree lens aims the beam onto the counter, desk or bench at a controlled angle, concentrating light where the task is while cutting glare and wasted spill for genuinely directed under-cabinet and workstation light.
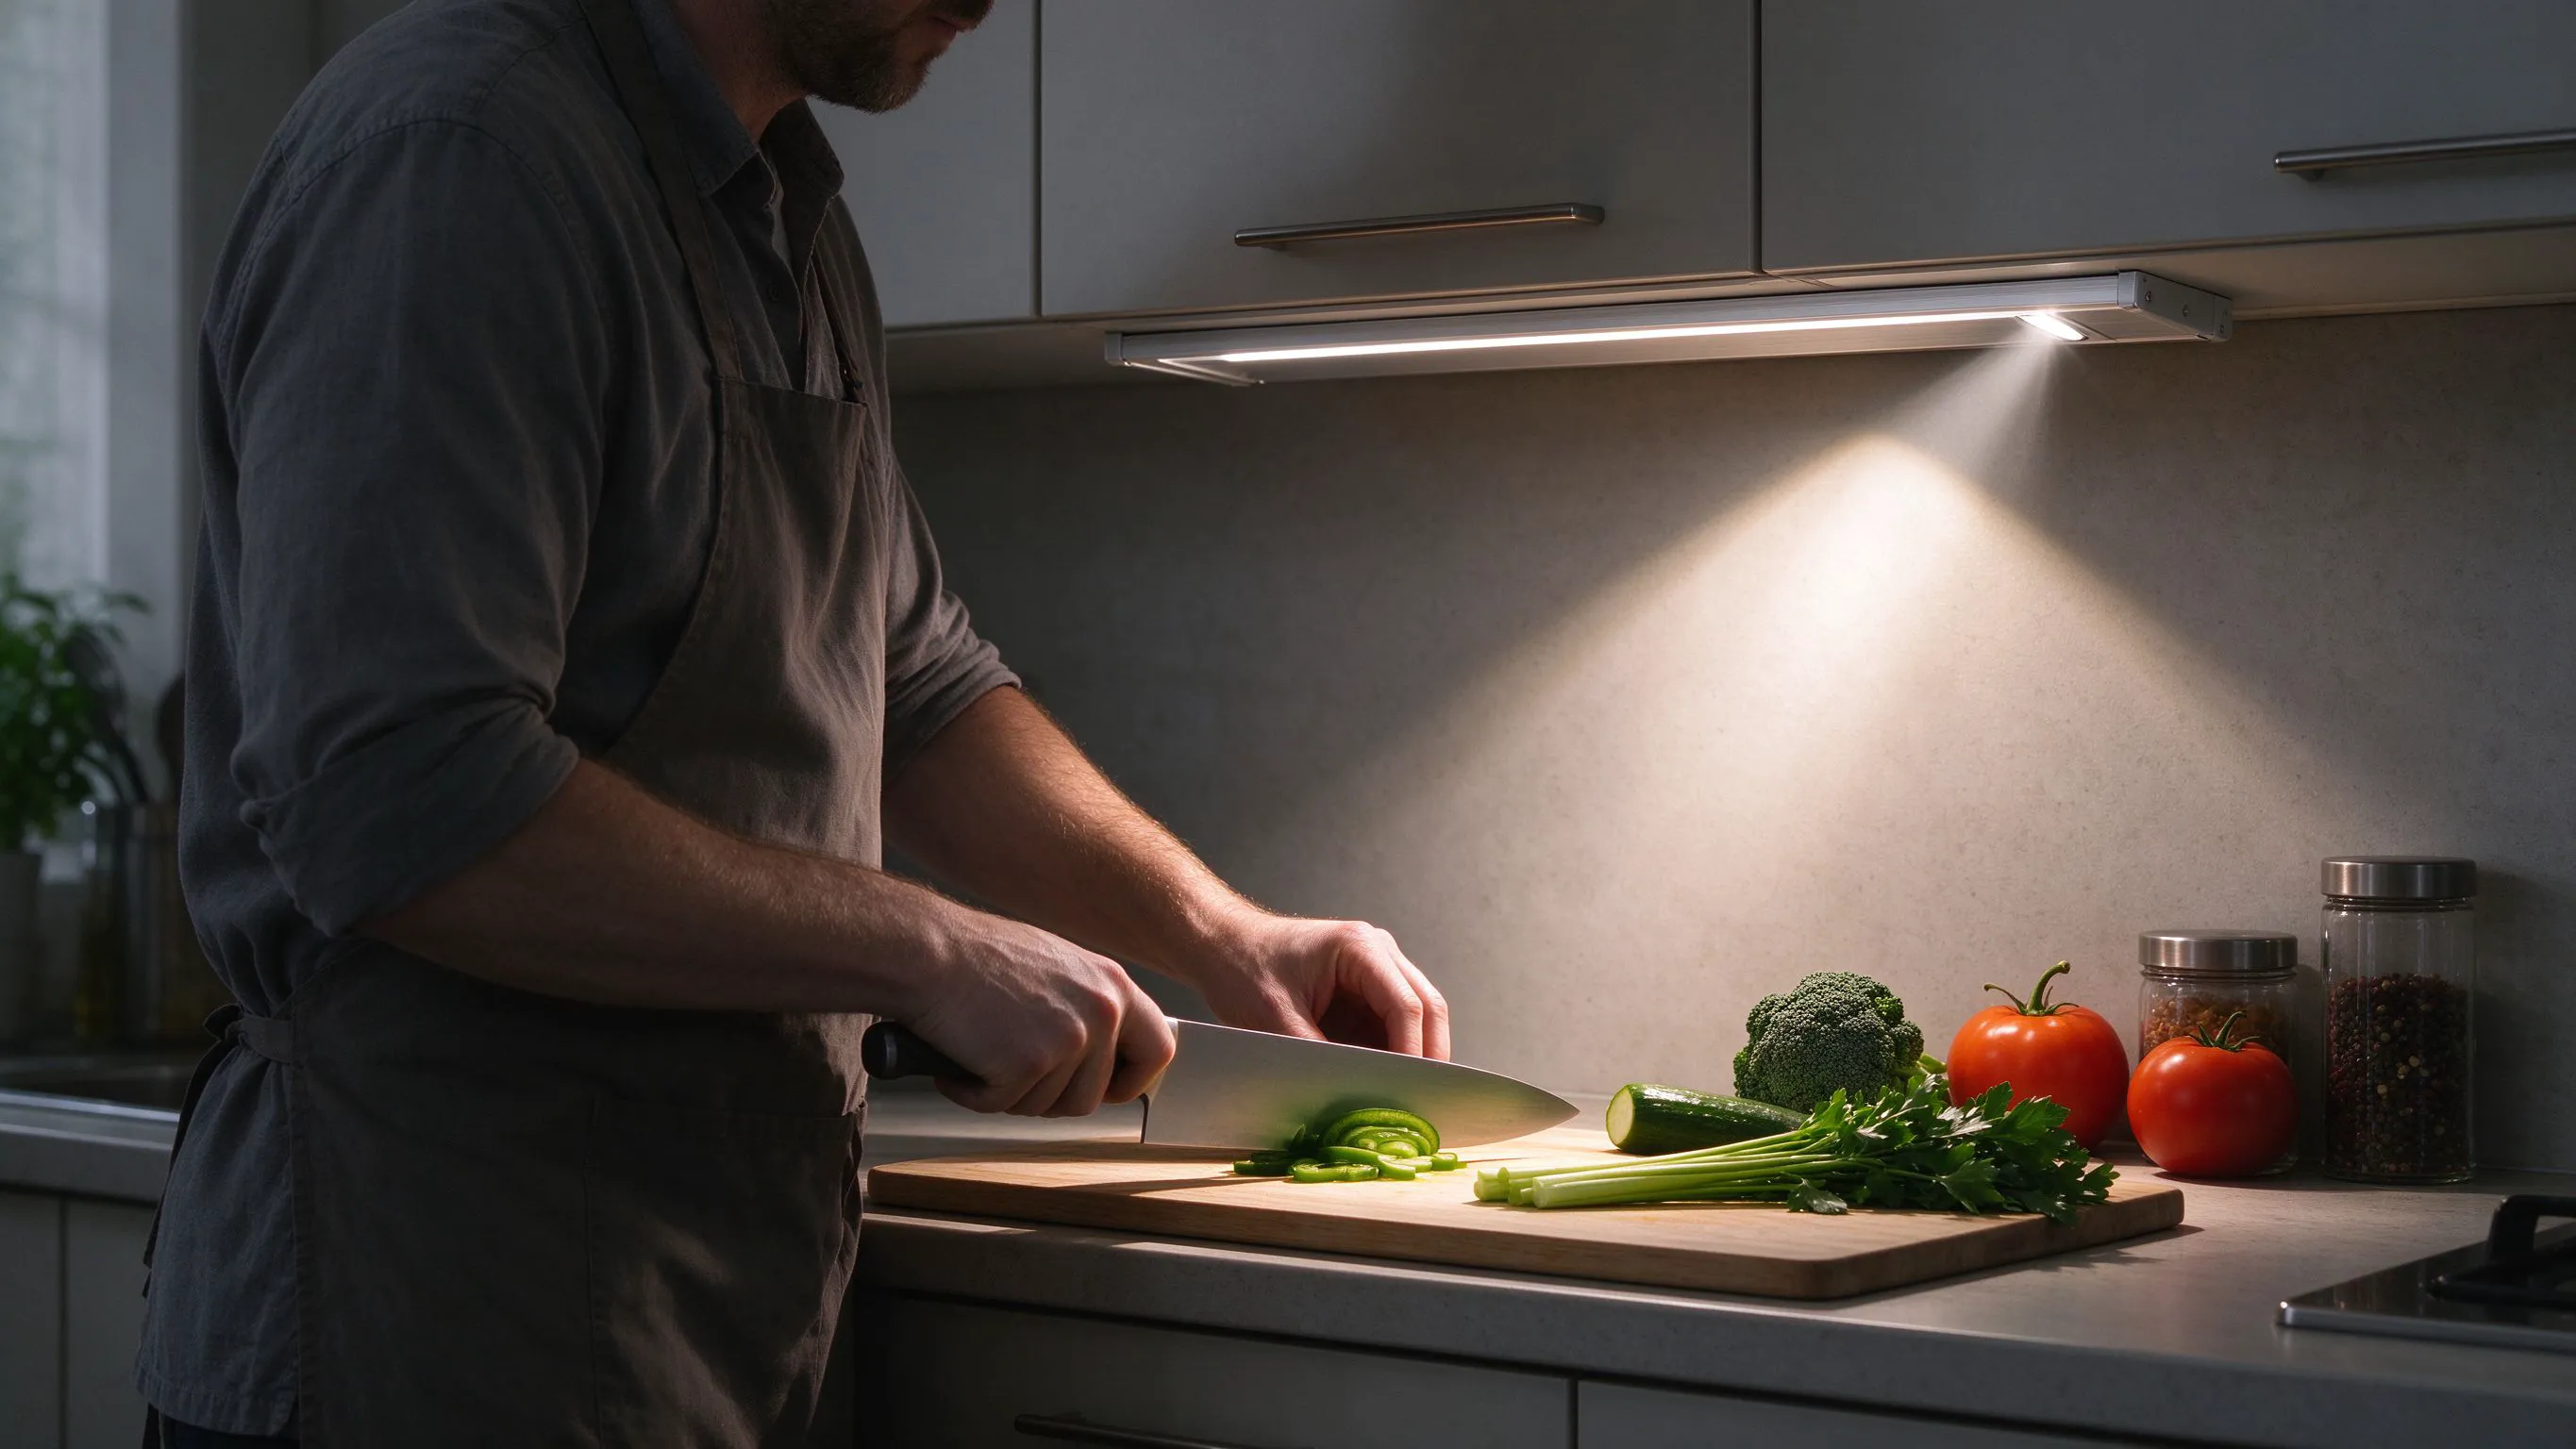
Why Flat Diffused Light Underperforms at Tasks
A standard channel with a flat or heavily diffused cover spreads light broadly, which is pleasant for ambient coves but inefficient for a task surface. Under a kitchen cabinet it lights the backsplash and the user's eyes as much as the chopping board, and at a workstation it spills onto screens and creates reflected glare rather than putting foot-candles on the work.
Directed task light needs an optic that angles the beam, and a linear profile with a 30-degree lens provides that aim in a clean extrusion.
What the 30-Degree Lens Profile Does
- Aims light at roughly 30 degrees onto the task surface.
- Concentrates light on the counter, desk or bench.
- Reduces glare and spill into eyes and screens.
- Improves task-surface brightness per watt.
- Clean linear form for under-cabinet and workstation use.
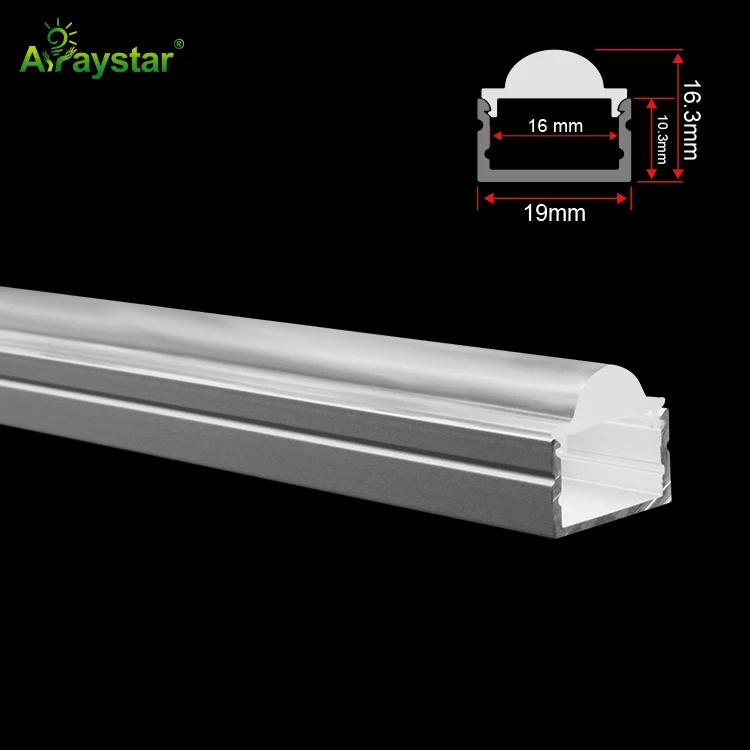
For directed task light I use the 30-degree lens profile. It puts the beam where the work happens instead of flooding the surrounding space.
Wide Diffuse vs 30-Degree Directed Beam
Match beam angle to whether you need ambient spread or directed task light.
| Profile/lens | Beam | Best for |
|---|---|---|
| Flat diffuse cover | Very wide, soft | Ambient coves, general light |
| 30-degree lens | Aimed, controlled | Counter and desk task light |
| Narrow spot lens | Tight beam | Accent and highlighting |
Where 30-Degree Task Profiles Are Used
- Under-cabinet kitchen task lighting over worktops.
- Workbench and task-bench lighting in workshops.
- Desk and workstation linear light angled to paperwork.
- Retail shelf and display case directed illumination.
- Reading and study positions needing glare-free beam control.
Positioning and Aim for the Task Surface
The lens aims the beam, but mounting position decides where it lands. I mount under-cabinet profiles toward the front edge so the angled beam reaches the back of the counter without the body casting a shadow, and I verify the beam centre lands on the primary task zone rather than the floor at the user's feet. At desks I angle to light the keyboard and document area while keeping the source out of screen-reflection geometry.
- Mount toward the cabinet front edge to reach the back counter.
- Aim the beam centre at the primary work zone.
- Keep the source out of screen and eye glare angles.
- Check the user's seated and standing positions.
Glare Control and Shielding
Directed lenses concentrate light, which can make the visible source brighter, so shielding matters. I position the channel so the cabinet or a small lip hides the direct view of the lens from normal standing and seated eye positions, letting the angled light reach the surface while the source itself stays concealed. This indirect-source technique is what makes directed task light comfortable rather than a bright strip shining in the face.
Beam Overlap and Uniformity on Long Runs
A 30-degree beam produces a defined pool, so long counters need the profiles or LED density planned so adjacent beams overlap into a continuous band without bright and dark patches. I space fixtures to the lens throw and mounting height, and I confirm uniformity on the actual surface; a single short aimed profile cannot light a three-metre bench evenly, and over-spacing is the common cause of striped task light.
Specifying Directed Task Light
Send the task surface depth and material, cabinet or desk mounting height and position, run length, and the user's eye positions. I will confirm the 30-degree lens profile, mounting setback, spacing for overlap and shielding detail. We supply the 30-degree lens profile and recommend checking the beam on the actual work surface, including glare from the user's normal positions, before final fixing.
Focusing Under-Cabinet Light on a Working Kitchen Run
A keen home cook complained that the existing under-cabinet light, a flat diffused strip mounted centrally under the wall cabinets, left the front half of the worktop dim while shining into her eyes when she stood at the hob, and it reflected faintly in the splashback. The light was technically bright at the source but poorly aimed, classic diffuse coverage that pleased nobody in a task-focused kitchen.
- Replace the flat diffuse strip with the 30-degree lens profile to direct the beam onto the work surface.
- Move the mounting position toward the cabinet front edge so the angled beam reaches the back of the counter near the splashback.
- Add a small shielding lip so the lens is hidden from standing eye height while light reaches the board.
- Space the sections so the 30-degree pools overlap into one continuous bright band along the run.
- Verify aim at both the chopping zone and the hob from the cook's actual standing positions.
We installed the 30-degree lens profiles toward the front underside of the wall cabinets, which sounds counterintuitive but lets the angled beam travel back across the full depth of the countertop, landing the brightest zone exactly on the preparation board and the hob rather than just the cabinet's toe. A small timber lip on the cabinet front concealed the lens from normal standing eye height, so the cook saw a brightly lit surface with no direct view of the source, eliminating both the glare and the splashback reflection. We spaced the sections by testing the lens throw at the cabinet height, adding one extra section the initial count had under-specified so the overlapping beams produced a continuous band with no striped dips between units. The difference measured on the worktop was striking, far more useful light on the cutting surface at the same wattage, because lumens that had previously lit the cook's forehead and the floor were redirected onto the task. We confirmed the aim from both the prep and hob standing positions during an evening cook, adjusting one section near the extractor that the housing partially shadowed. The client's feedback was that she no longer leaned into her own shadow while chopping, which is the single most telling sign that under-cabinet light has been aimed rather than merely installed. The project is my reminder that task lighting quality is decided by beam direction and shielding geometry, not by raw brightness.
Recommended Products
Frequently Asked Questions
What is a 30-degree lens linear LED profile?
It is an aluminium channel fitted with an optic that emits light in a beam angled at roughly 30 degrees, aiming it onto a task surface such as a counter or desk rather than spreading it broadly like a flat diffused cover. It concentrates light where the work is and reduces glare and wasted spill.
When should I use a 30-degree lens instead of a diffused cover?
Use the 30-degree lens for directed task light such as under-cabinet worktops, workbenches and desks where light should land on the surface and stay out of the eyes and screens. Use a flat diffused cover for ambient coves and general soft illumination where wide even spread is the goal rather than a concentrated aimed beam.
Where do I mount an angled task profile under a cabinet?
Mount it toward the front edge of the cabinet so the angled beam reaches the back of the worktop without the cabinet body casting a shadow, and confirm the beam centre lands on the primary task zone rather than the floor. At desks, angle it to light the keyboard and documents while keeping the source out of screen-reflection and eye glare geometry.
How do I stop a directed lens causing glare?
Position the channel so the cabinet or a small shielding lip hides the direct view of the lens from normal standing and seated eye positions, allowing the angled light to reach the surface while the bright source stays concealed. Directed optics can appear bright, so shielding the source is essential for comfortable task lighting.
How do I keep a long counter evenly lit with a 30-degree beam?
Space the profiles or choose LED density so the defined beams overlap into a continuous band at the actual mounting height and lens throw; over-spacing produces striped bright and dark patches. Confirm uniformity on the real surface, because one short aimed profile cannot light a long bench evenly on its own.
Need help with your LED project?
Get factory-direct pricing, free samples and engineering support within 24 hours.
Email: info@arraystarled.com | Phone: +86-0755-2103-6746 | WhatsApp: 0086 1581 8514 077
Need to size your power supply? Use our LED Strip Power Calculator to find the right driver in seconds.







