
Diffuse-Reflective Lens Strips for Even Lightboxes
- 2026-10-09 18:41
- /
- Arraystar LED
Backlit lightboxes and panels betray cheap LED immediately with hot spots, bright stripes and dim corners where discrete LEDs shine straight through the diffuser. A diffuse-reflective lens rigid strip spreads and bounces the light sideways before it reaches the face, producing the smooth, even, shadow-free backlight that lightboxes, menu boards and backlit panels require at a practical LED spacing.
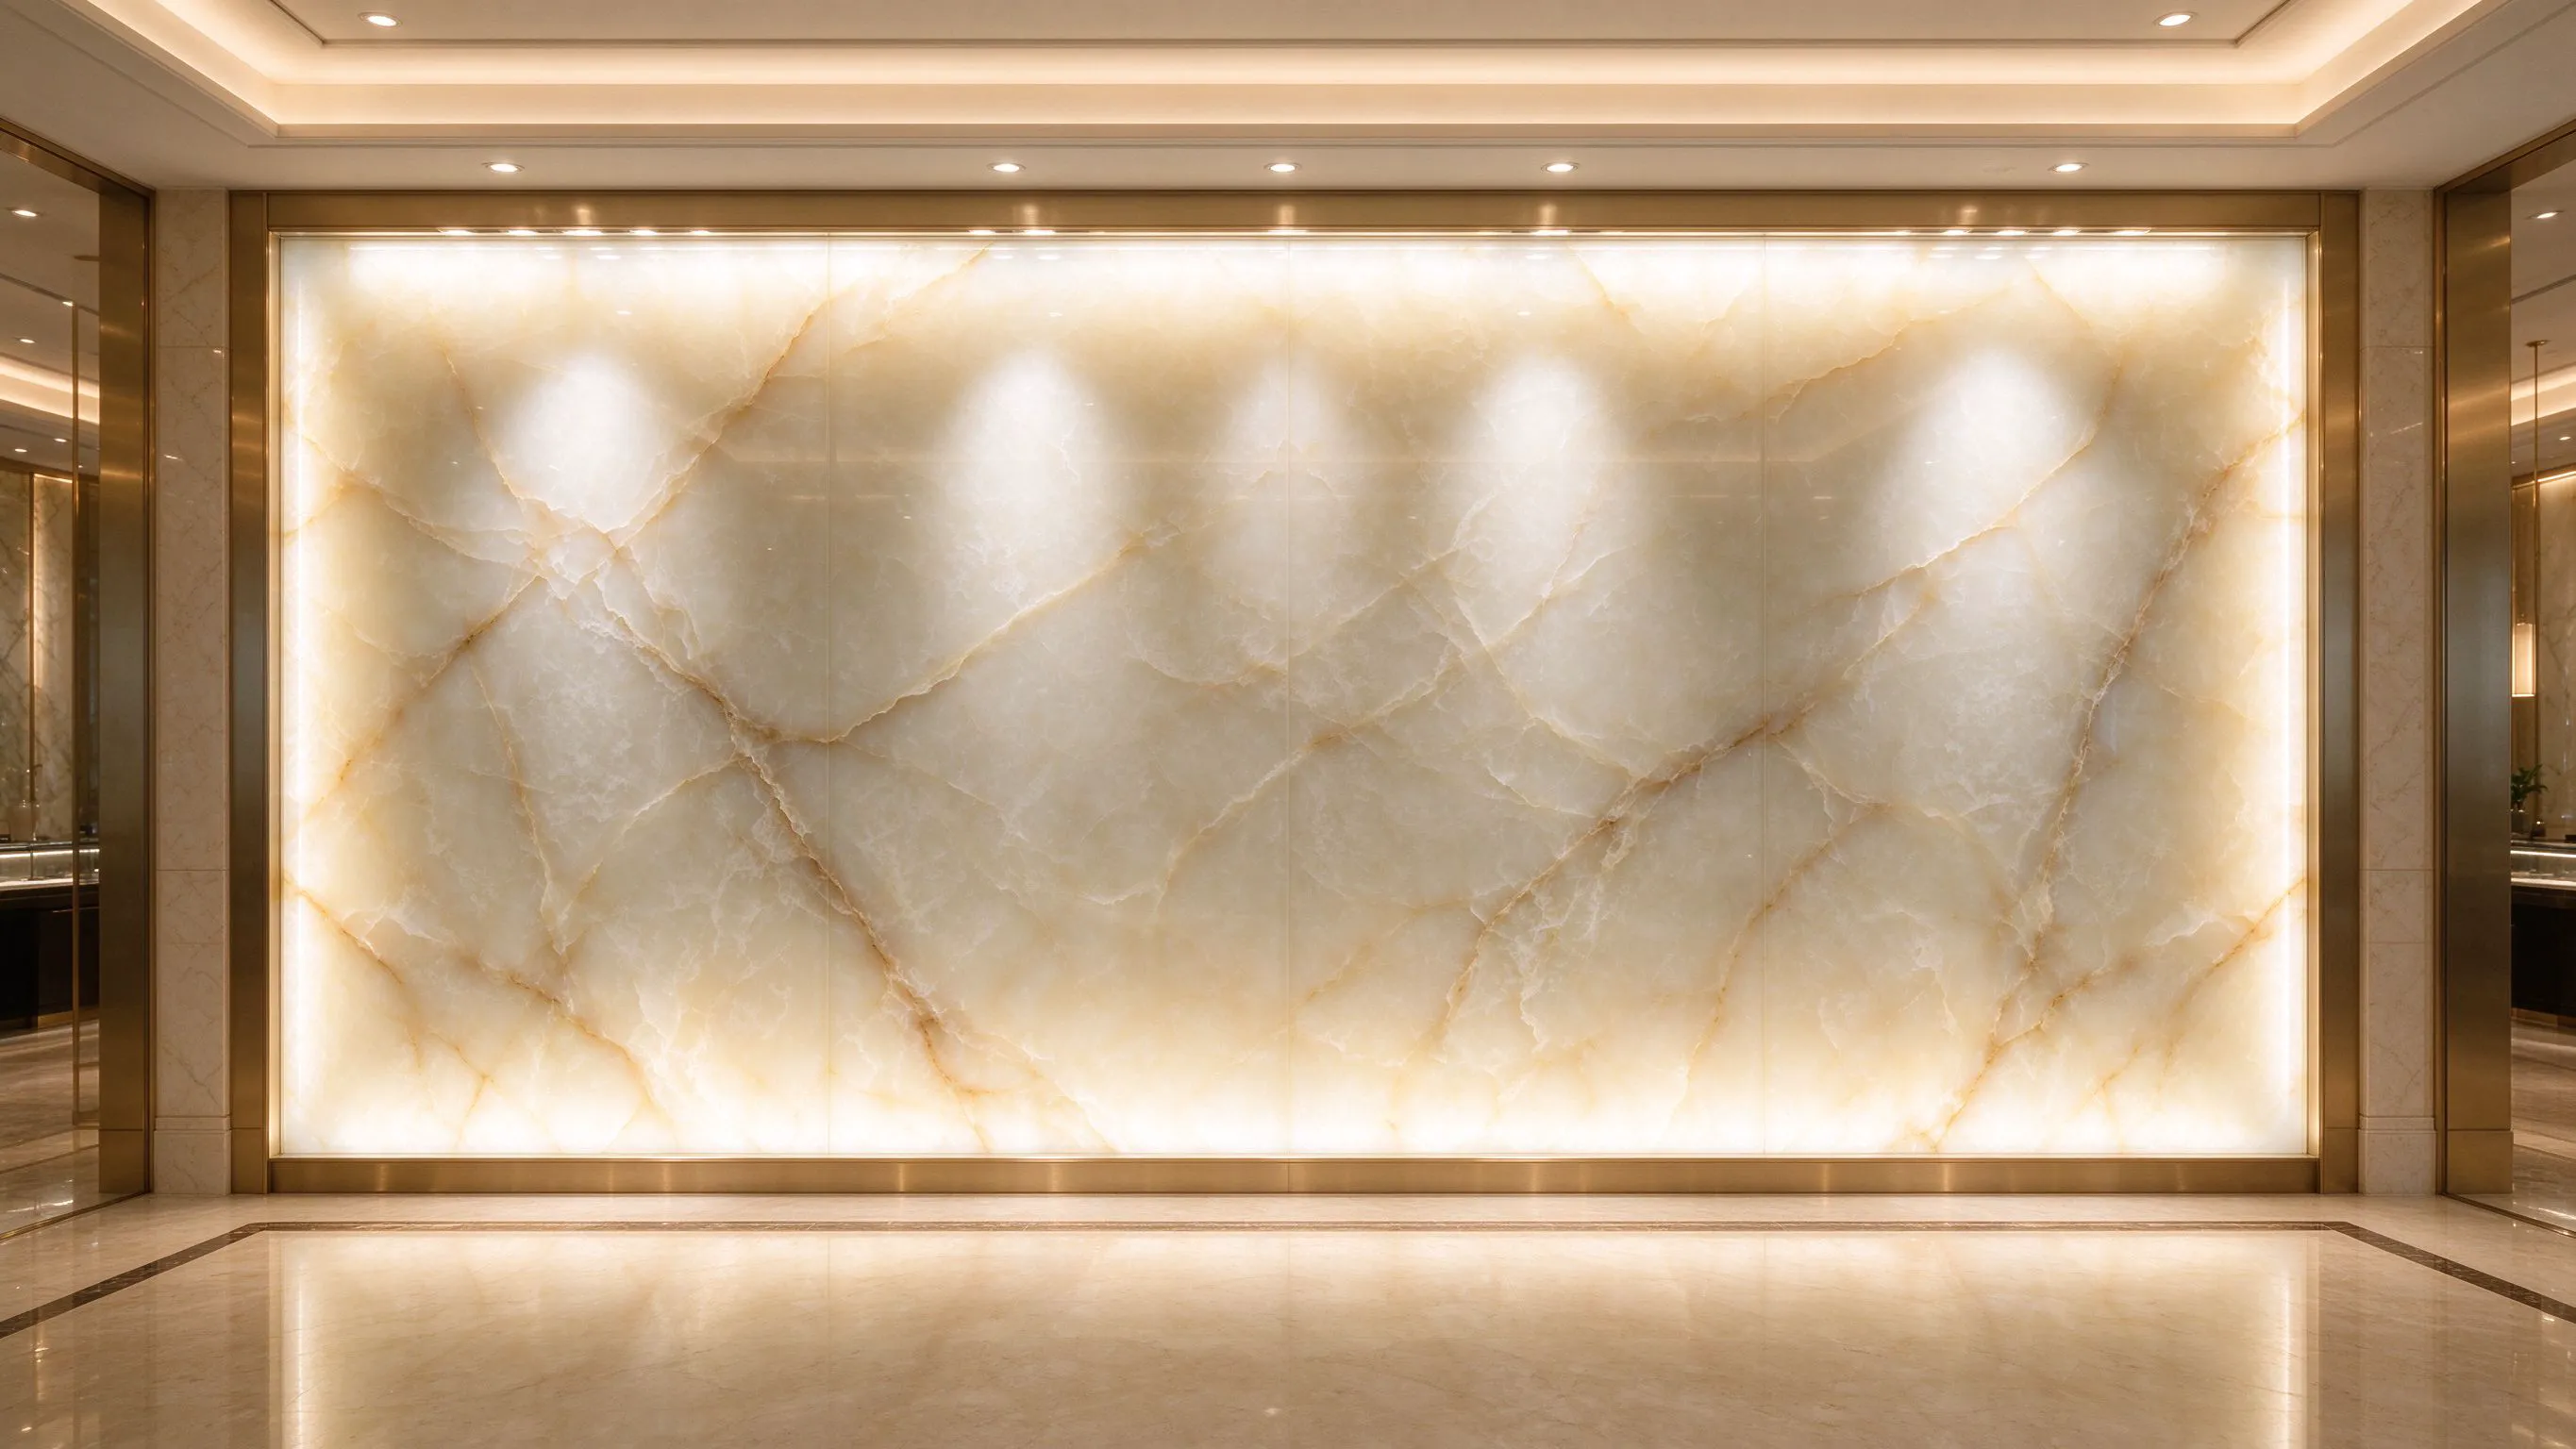
Why Backlit Panels Show Every LED Hot Spot
Lighting a translucent face from behind is deceptively hard. Ordinary strip mounted behind a lightbox shines each LED directly toward the diffuser, and unless the LEDs are extremely dense or very far from the face, the result is a panel of visible bright dots and stripes with dark gaps between them, the tell-tale look of a low-quality lightbox or menu board.
The engineering goal is to homogenise the light before it reaches the face, and a diffuse-reflective lens rigid strip does this by spreading and reflecting the beam sideways rather than emitting it straight forward.
What the Diffuse-Reflective Lens Strip Does
- Spreads and reflects light sideways to blend sources.
- Eliminates LED hot spots and stripes through the face.
- Enables even backlighting at practical spacing.
- Rigid bar form for orderly panel layouts.
- Smoother lightboxes, menu boards and backlit panels.
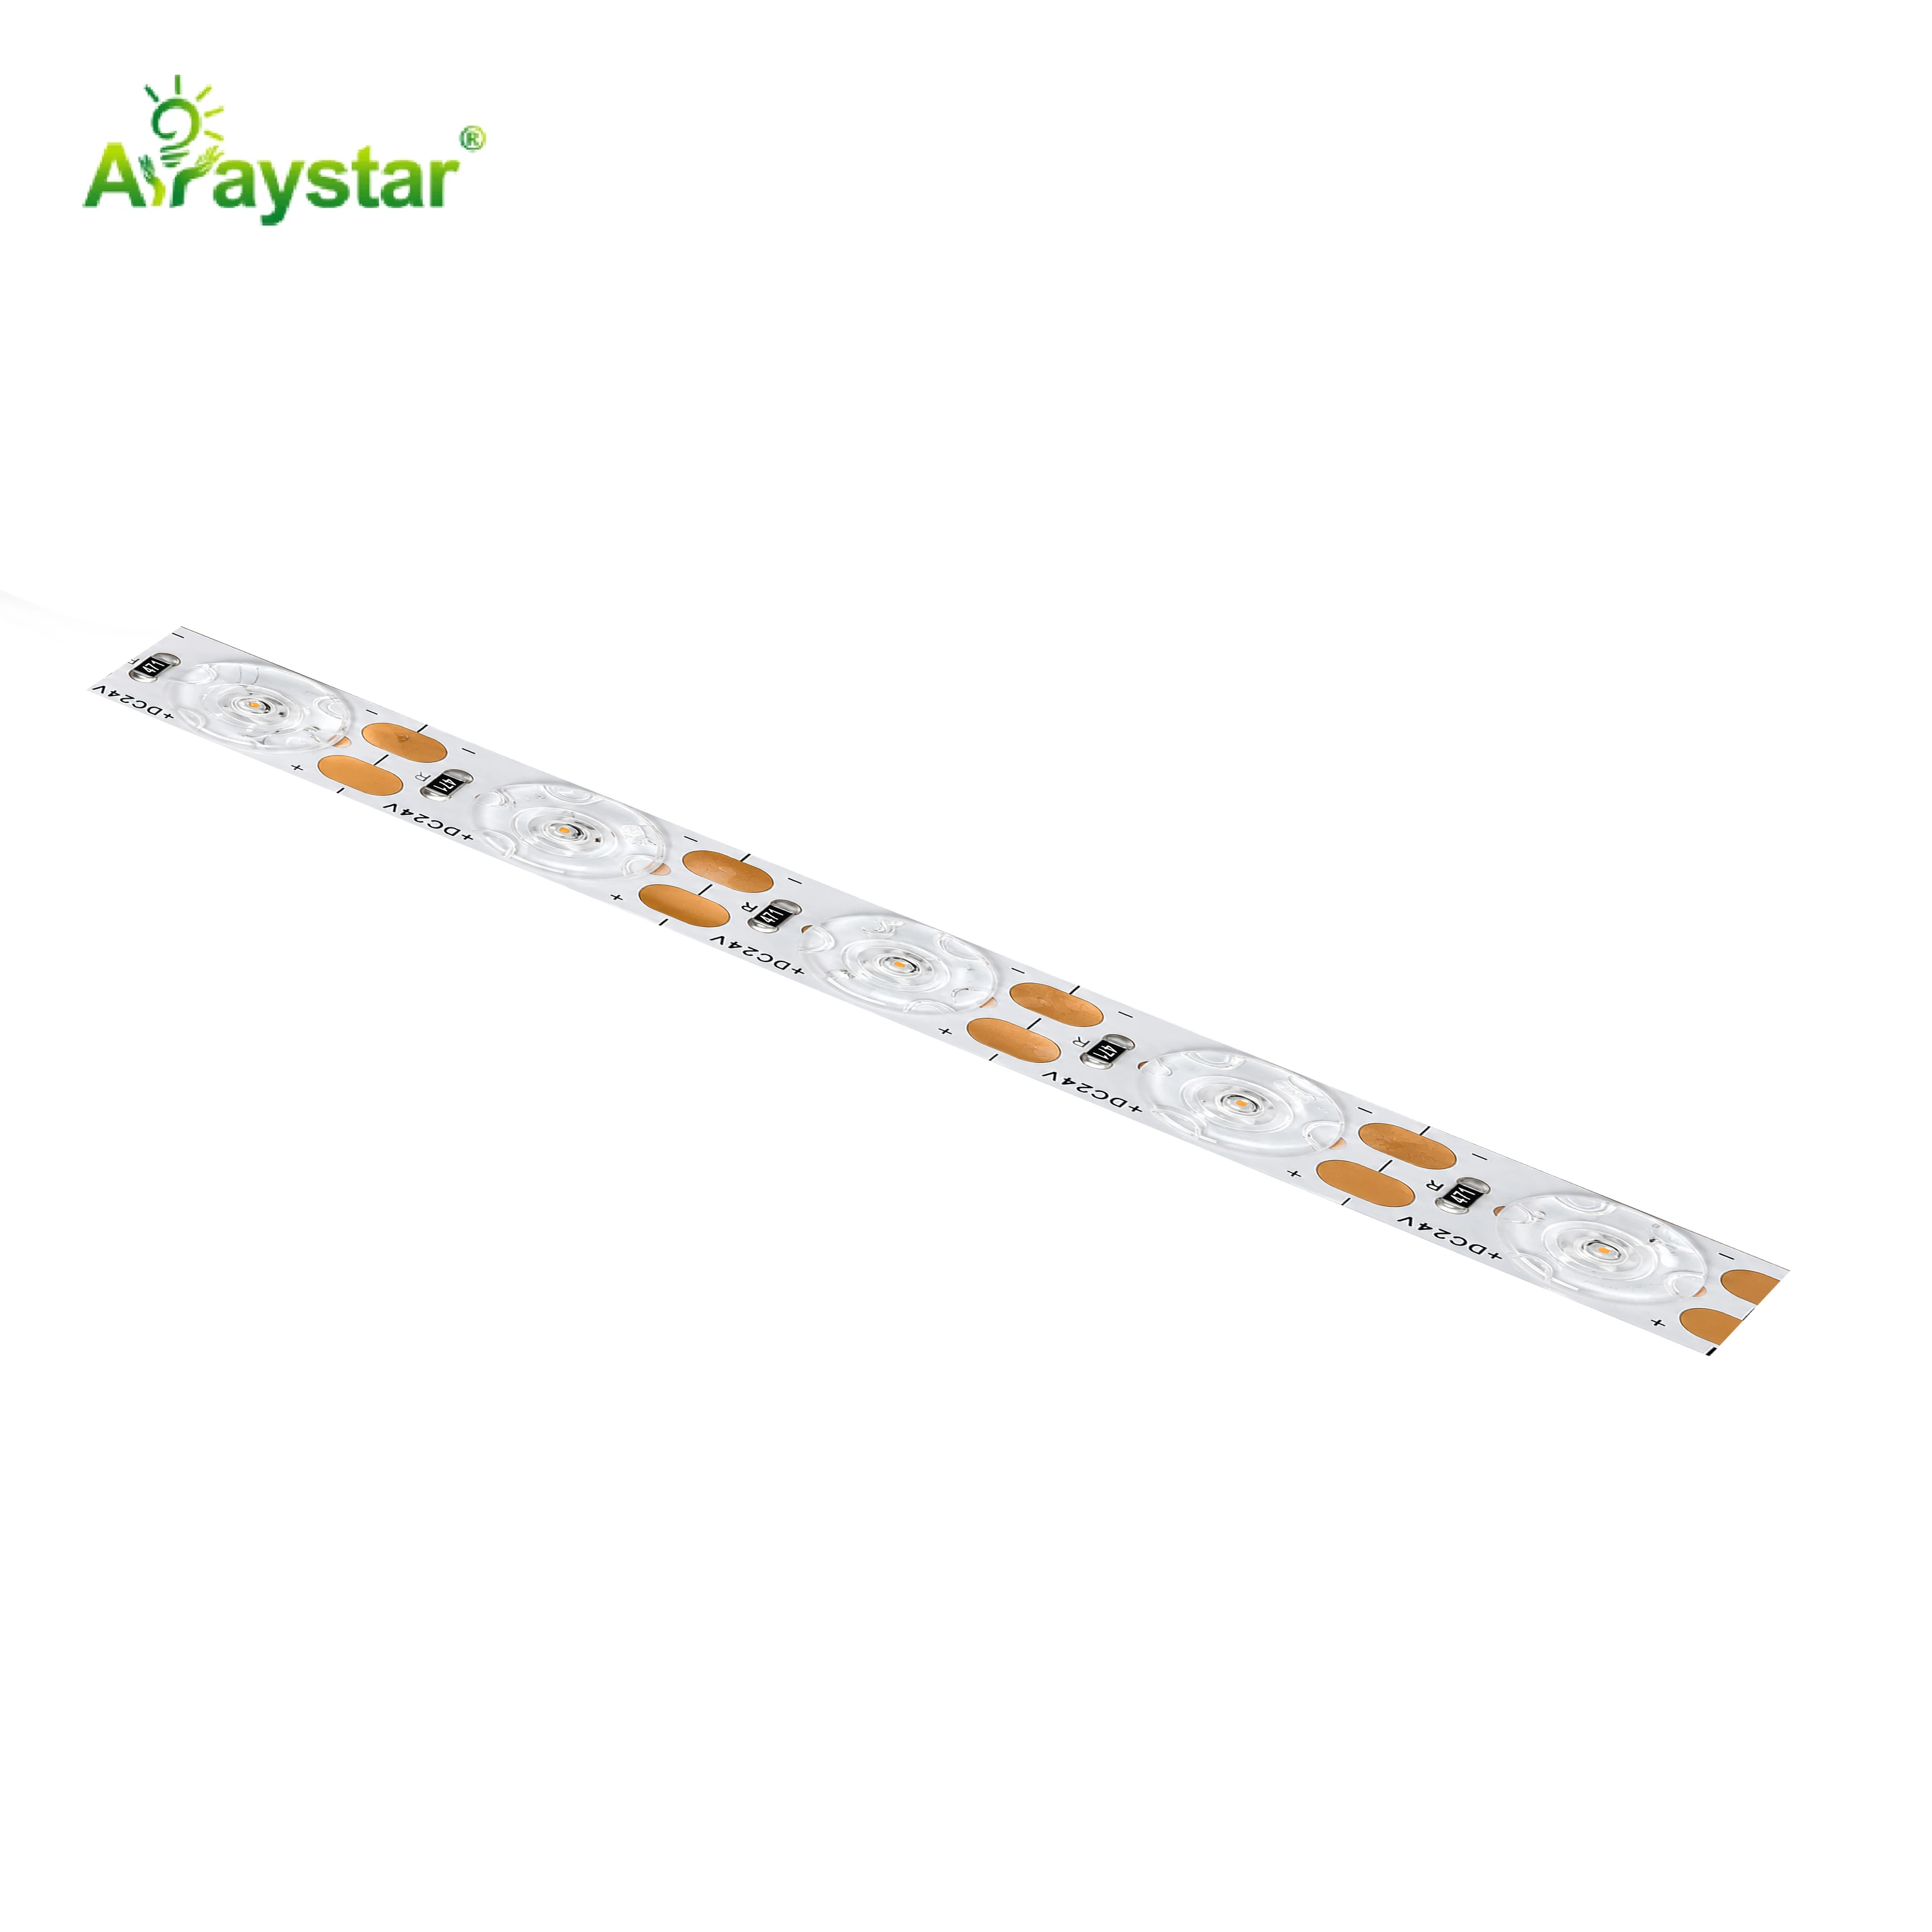
For backlit panels I use diffuse-reflective lens strip. It homogenises the light so the face reads as one smooth illuminated surface rather than a grid of dots.
Plain Strip vs Diffuse-Reflective Lens in a Lightbox
Reflective lensing evens the backlight without extreme density.
| Backlight method | Face appearance | Spacing/depth needed |
|---|---|---|
| Plain strip direct | Visible dots and stripes | Very dense or very deep |
| Edge-lit panel | Even but size-limited | Specialised light guide |
| Diffuse-reflective lens bar | Smooth, even | Practical spacing/depth |
Where Even Backlighting Is Required
- Menu boards and fast-food ordering panels.
- Backlit signage, lightboxes and advertising displays.
- Backlit stone, onyx and translucent feature panels.
- Retail display cases and illuminated graphics.
- Tracing, photography and inspection light panels.
Spacing, Depth and the Blending Distance
Evenness is governed by the relationship between LED spacing and the distance to the diffuser, the blending depth. The reflective lens widens the effective spread, allowing wider bar spacing or shallower boxes while staying uniform, but it does not remove the physics entirely. I lay out the bars on an even grid, keep the spacing-to-depth ratio within the even zone, and pay special attention to panel edges and corners, which naturally run dim and need bars carried closer to the perimeter.
- Use an even grid with consistent bar spacing.
- Respect the spacing-to-diffuser-depth blending ratio.
- Carry bars closer to edges and corners to avoid dim borders.
- Mock a corner at the real depth before building the whole box.
Reflective Surfaces and Cavity Colour
The lens works with the cavity, not in isolation. I line the lightbox interior with a white or reflective surface so sideways and rearward light is bounced forward rather than absorbed, which lifts uniformity and efficiency, especially at the edges. A dark or raw cavity wastes the reflected component and forces more LEDs to reach the same brightness, so cavity finish is a genuine part of the optical design rather than an aesthetic afterthought.
Brightness Uniformity, Colour and Power
I specify consistent binning and colour temperature across all bars so a large panel does not show patches of slightly different white, and I power the grid with injection and multiple feeds so the centre and corners match in brightness. For very even panels I measure or visually assess uniformity with the diffuser fitted at full brightness, because uniformity problems are only fully visible through the finished face, not from the bare bars.
Specifying a Backlit Panel System
Send the panel dimensions, diffuser type and depth, desired face brightness and whether it is a sign, menu board or translucent material. I will confirm the diffuse-reflective lens strip quantity, bar spacing grid, edge treatment, reflective cavity and power layout. We supply the lens strip and recommend building a representative section including a corner at the true depth to verify hotspot-free uniformity before fabricating the full panel.
Backlighting a Bookmatched Onyx Feature Wall
A luxury residential lobby was to feature a large bookmatched onyx wall glowing from behind, the classic translucent-stone application where evenness is everything: any hot spot, dim patch or visible LED grid would be magnified across the natural veining and ruin the premium effect. The stone was to be mounted with a relatively shallow cavity, and the contractor's first suggestion of ordinary strip on a grid risked showing distinct stripes through such an expensive material.
We specified diffuse-reflective lens rigid bars specifically for their sideways spread, and treated the optical cavity as carefully as the stone. The rear of the cavity was lined with a high-reflectance white backing so light that bounced off the lens sideways and backward was reflected forward through the onyx rather than lost, which lifted the edges and corners that are the usual dim zones of a backlit panel. We laid the bars on an even grid sized to the shallow depth, ran a physical mock with an offcut of the actual bookmatched stone, and adjusted the spacing until no individual bar was discernible and the veining glowed uniformly; the mock also revealed that the initial bar layout left the outer two hundred millimetres dim, so we carried bars closer to the perimeter. Consistent colour-temperature binning across every bar mattered enormously on natural stone, where even a slight white tint difference between bars would have shown as patches against the warm translucent onyx, and we powered the grid from multiple feeds so the centre matched the corners in brightness. The finished wall glows as one seamless luminous surface, the bookmatched veining reading continuously across the panels with zero visible LED structure, exactly the effect the material was chosen for. The budget for the reflective cavity and the mock was tiny against the cost of the stone and saved the installation from the hotspot failure that would have been obvious forever. It is the benchmark I use for translucent-material backlighting: the lens and the reflective cavity do the optical work, the spacing-to-depth ratio must be proven on the real material, and uniformity across expensive stone is engineered and mocked before a single panel is fixed, never hoped for after.
Recommended Products
Frequently Asked Questions
What is a diffuse-reflective LED lens strip?
It is a rigid LED bar with a lens that spreads and reflects light sideways instead of shining each LED straight forward, homogenising the light before it reaches a diffuser. This removes the bright dots and stripes that plain strip produces behind a lightbox, allowing an even backlight at practical LED spacing and cavity depth.
Why does my lightbox show visible LED dots?
Plain strip shines each LED directly at the diffuser, and if the LEDs are not dense enough or the box is too shallow, individual sources show as dots and stripes with dark gaps. Use diffuse-reflective lens bars to widen and blend the light, increase spacing-to-depth appropriately, and carry bars closer to the edges and corners that naturally run dim.
How do I space backlight bars for an even panel?
Arrange the bars on an even grid and keep the ratio of bar spacing to diffuser distance (blending depth) within the even zone for the lens; the reflective optic allows wider spacing or shallower boxes than plain strip but does not remove the physics. Carry bars closer to the perimeter and mock a corner at the true depth before building the full box.
Does the inside colour of a lightbox matter?
Yes. Line the cavity with a white or reflective surface so sideways and rearward light is bounced forward through the face, improving uniformity and efficiency especially at the edges. A dark or raw interior absorbs the reflected component and forces more LEDs to achieve the same brightness, so cavity finish is part of the optical design.
How do I avoid uneven colour or brightness across a large panel?
Use consistently binned bars of one colour temperature so the face does not show tint patches, and power the grid with multiple feeds and injection so corners and centre match in brightness. Assess uniformity only with the diffuser fitted at full brightness, since unevenness is fully visible through the finished face rather than on the bare bars.
Need help with your LED project?
Get factory-direct pricing, free samples and engineering support within 24 hours.
Email: info@arraystarled.com | Phone: +86-0755-2103-6746 | WhatsApp: 0086 1581 8514 077
Need to size your power supply? Use our LED Strip Power Calculator to find the right driver in seconds.







