
Split-Type Neon Tubes for Ultra-Thin Channel Letters
- 2026-10-09 18:39
- /
- Arraystar LED
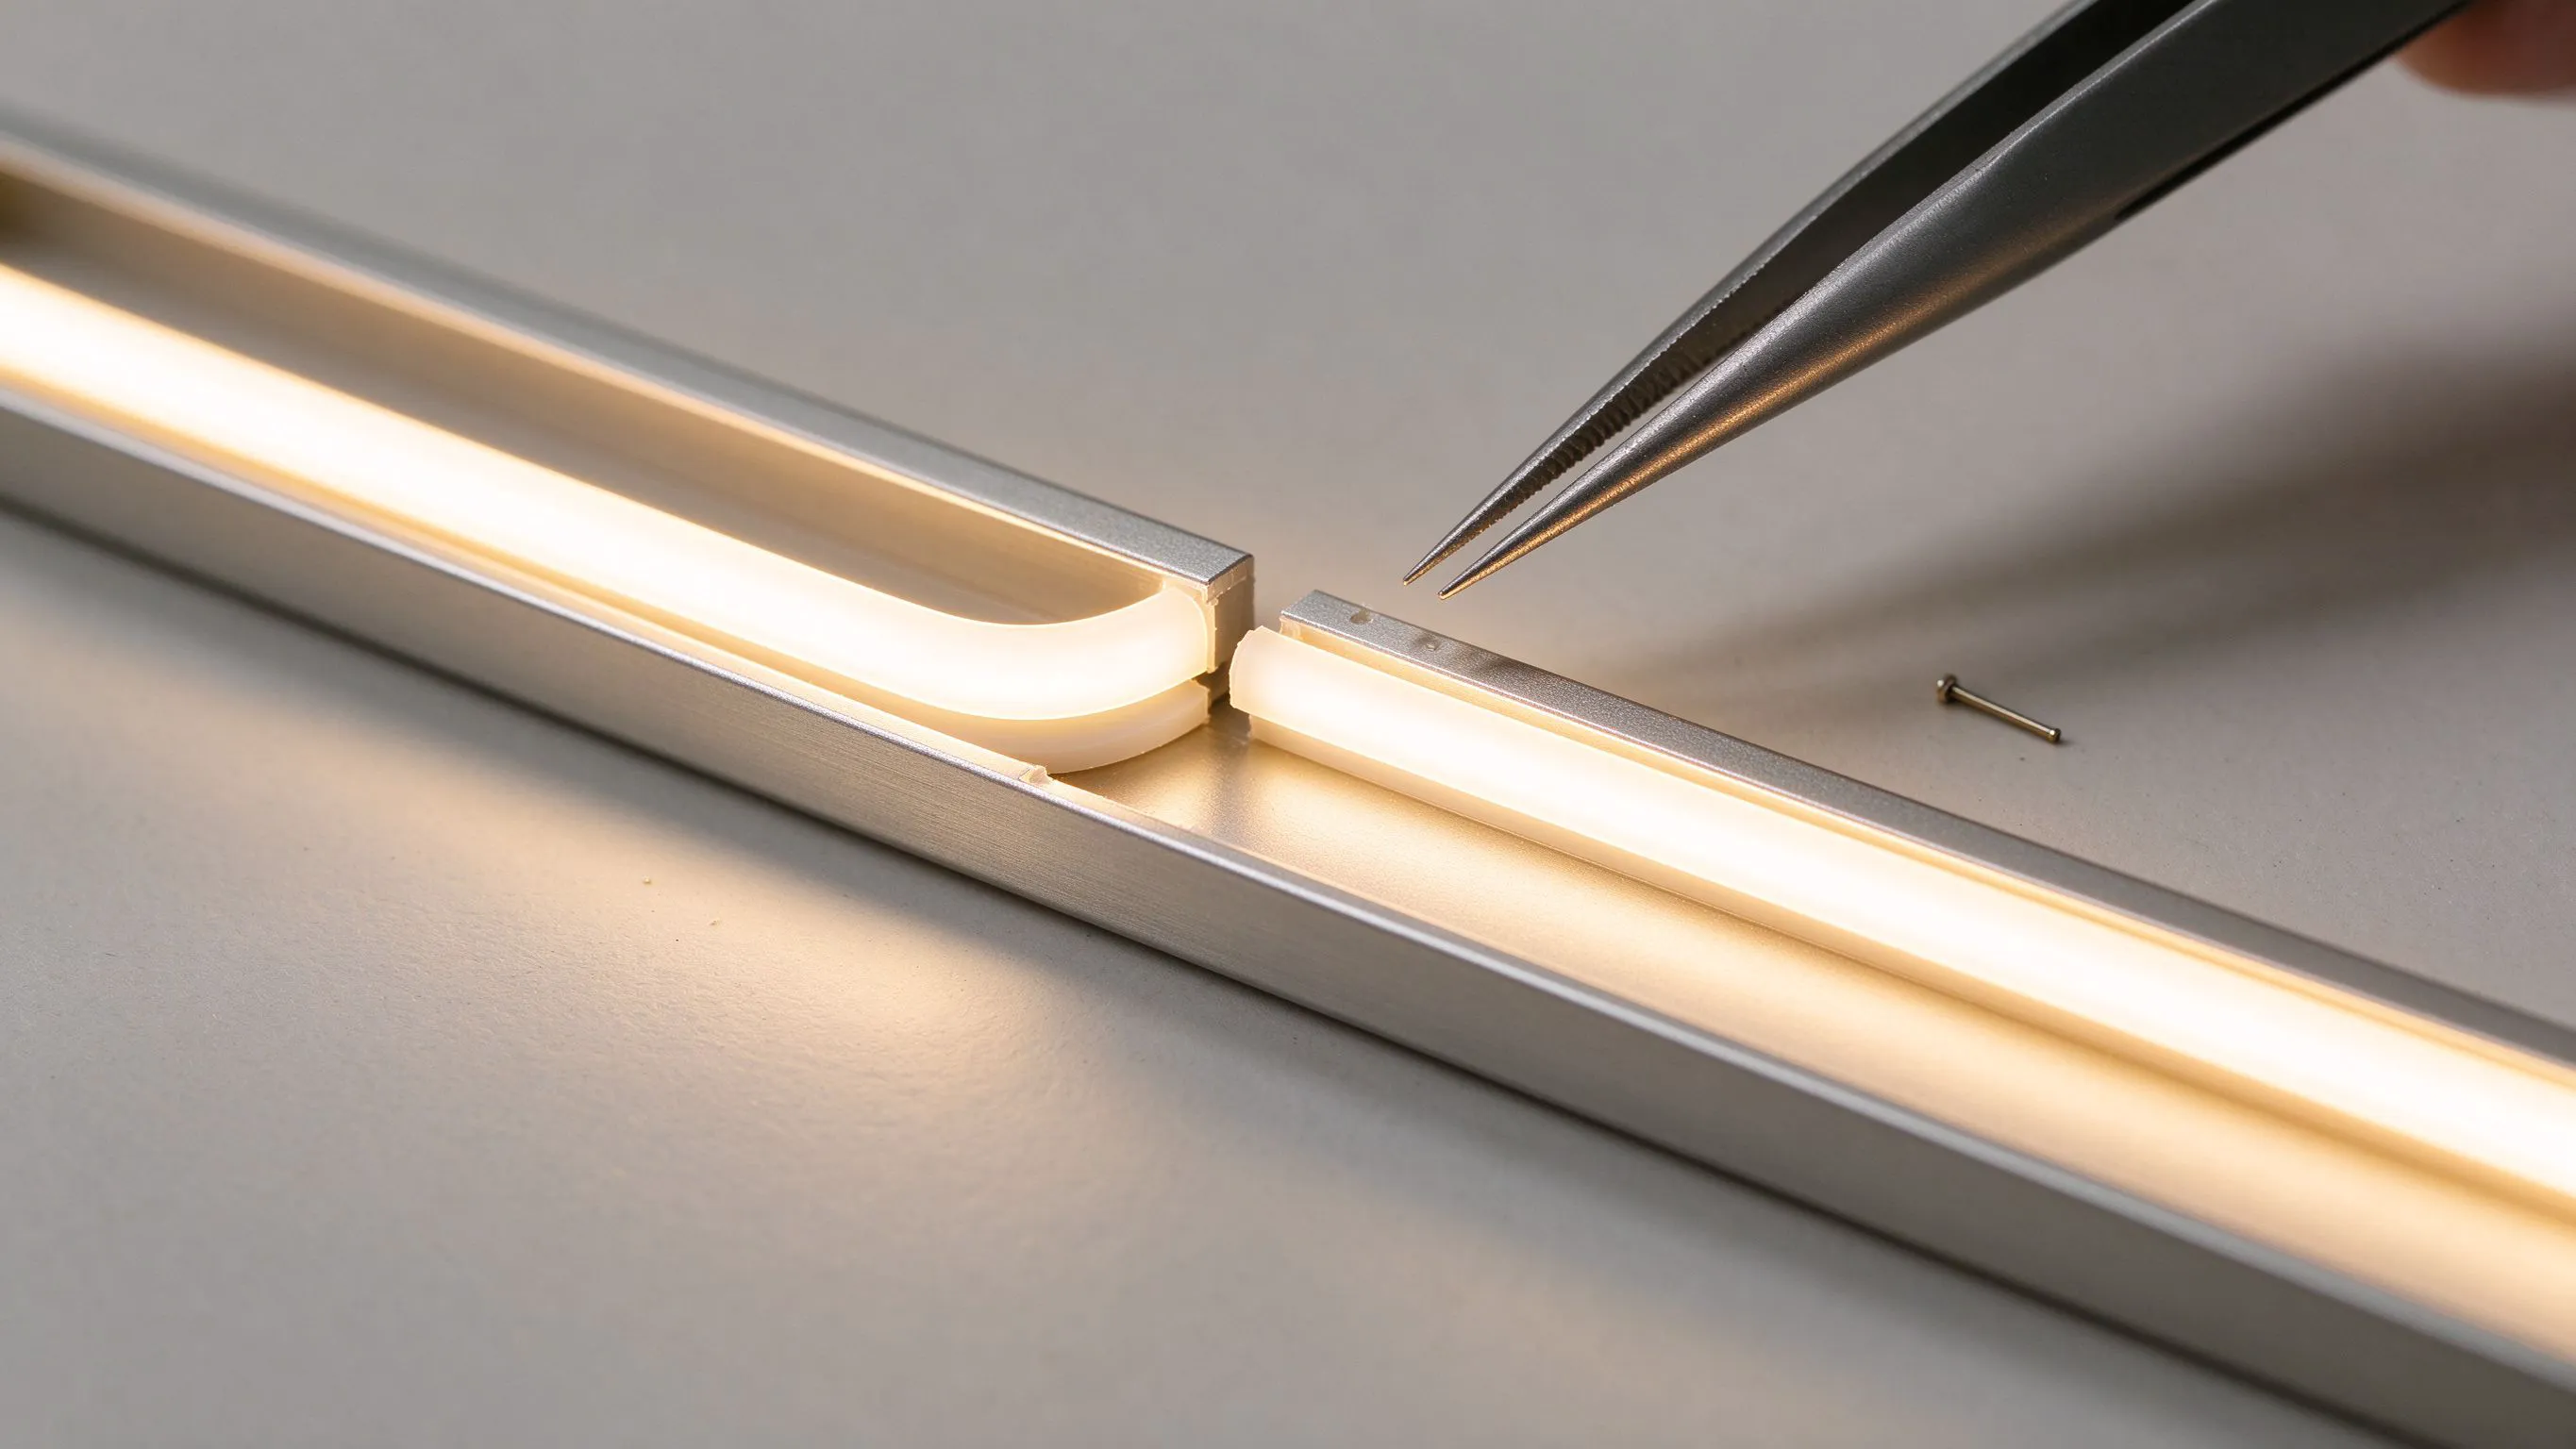
Below a certain stroke width, threading a solid silicone tube is impossible without kinking or tearing. A split (two-piece) neon tube solves this by opening along its length and clipping around the strip, which makes ultra-thin channel letters and delicate logos practical. The trade-off is careful alignment and sealing, because the join line is now part of the optical and waterproofing design.
The Wall You Hit With Thin Letters
Brand logos keep getting more refined: thin scripts, delicate serifs, narrow sans-serif strokes. They look beautiful as artwork and become a manufacturing headache the moment you try to light them. A solid neon tube has to be fed over the strip from one end, and on a very narrow stroke the tube either will not make the tight internal bends or it kinks, whites-out and refuses to sit flat.
When a client's logo sits below the practical threading size, I switch from a solid tube to a split-type neon tube rather than compromise the design with thicker strokes.
How a Split-Type Tube Works
- Two-piece or hinged body. The tube opens along its length (or separates into a base and cover) so the strip is laid in rather than threaded.
- Clip-together closure. Once the strip is seated, the two halves are pressed together to capture it in the channel.
- Side-emitting orientation. Split profiles are commonly used for side-bend work where the light needs to exit around tight curves and narrow faces.
- No end-feeding required. Because the tube opens along its length, tight and already-wired runs can be sleeved in place.
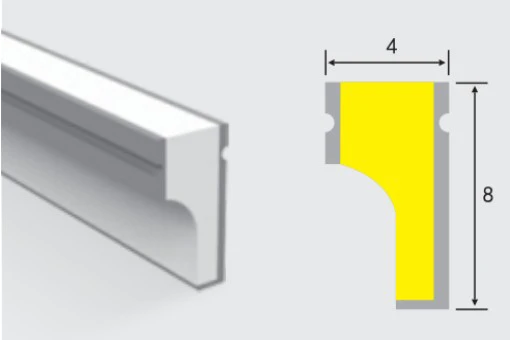
For the smallest work I use the ART-NT0408 split-type profile. Its tiny cross-section is aimed at precisely these thin logos and narrow strokes, and the split construction lets me get a continuous diffuser into geometry where a solid 0408 simply cannot be fed.
Where Split Tubes Win vs Solid Tubes
Split tubes solve access at the cost of seam management.
| Factor | Solid one-piece tube | Split two-piece tube |
|---|---|---|
| Very thin strokes | Cannot be threaded; kinks | Clips around strip; works |
| Tight internal bends | High friction, white-out | Applied in sections, easier |
| Already-wired runs | Must feed from an end | Can be sleeved in place |
| Waterproof sealing | Continuous body, simple | Join line must be sealed |
| Optical seam | None | Closure must be aligned cleanly |
| Cost / fitting time | Cheaper, fast on normal jobs | Slightly more fitting care |
Fitting a Split Tube Cleanly
Seat the strip first
Fix and wire the LED strip in the letter and confirm it lights evenly before closing any silicone. A split tube makes it tempting to rush, but correcting a bad strip after the cover is clipped means opening the whole run again.
Align the emitting window
On a side-emitting split profile the orientation of the opening determines where the light goes. Keep the emitting window aligned consistently through every stroke; a half-twist on one section shows as a visible dark or bright patch.
Close in sequence
Press the two halves together progressively along the run rather than snapping one whole side first, which can trap the strip off-centre. Work bends slowly so the closure mates without gaps.
Seal the seam and ends
For outdoor or washdown work, treat the split line and the end closures as part of the waterproofing, using the recommended sealant or closure method. An unsealed split line is a direct water channel onto the board.
Designing Logos That Are Actually Buildable
I would rather catch an unbuildable stroke at the artwork stage than on the bench. When a designer sends a logo I check the minimum stroke width against the smallest split profile available and flag anything below it. Most of the time a tiny adjustment to stroke weight keeps the look while making the sign lightable, and the client never notices the change.
- Avoid sharp internal angles below the bend radius of even the smallest split tube.
- Give enclosed counters (the holes in letters) enough room for the tube to turn.
- Confirm where wires will exit before committing to ultra-thin strokes.
Common Faults and Fixes
The four issues I see on split-tube thin-letter work.
| Fault | Cause | Fix |
|---|---|---|
| Visible seam line when lit | Closure misaligned or not fully seated | Re-open and re-seat; press progressively |
| Twisted light direction | Strip rotated inside the channel | Re-align emitting window along the run |
| Water inside after install | Split line or ends unsealed | Seal seam and fit proper end caps |
| Tube pops open at bends | Closed too quickly on a tight curve | Work bends slowly; use clips to hold |
Sourcing the Right Split Profile
Send the minimum stroke width, the bend direction, the strip dimensions and whether the sign is indoor or outdoor. Those facts determine whether a 0408 split profile is sufficient or a slightly larger split body is needed. I always request a sample to test the closure on the actual strip, because the fit between strip thickness and split channel is the critical dimension.
We supply the ART-NT0408 split-type and other split neon profiles for thin-letter work, with matching sealing accessories. Send the logo stroke dimensions and we will confirm the smallest buildable profile and send a sample to test on your bench.
Mixing Split Neon and LED Modules in One Sign
Most logos are not uniform. A brand mark might combine thin script strokes that suit split neon with broad solid areas or deep returns where individual LED modules are the better tool. I regularly build one sign using both, and the result is cleaner and more reliable than forcing a single light source into geometry it does not suit.
- Use split neon for narrow, continuous outline strokes that need a smooth line.
- Use LED modules for wide faces, deep returns and large enclosed areas where even flood coverage matters.
- Match colour temperature and binning between the two sources so the thin strokes and filled faces match.
- Plan wiring so the neon and module runs share drivers sensibly and can be serviced independently.
The trap to avoid is mixing colour temperatures or brightness levels between the neon and the modules; even a small difference is obvious once the face is lit. I order both sources against the same white specification and test them together in a sample letter before fabrication. It is also worth agreeing with the client at the artwork stage which strokes will be neon and which areas will be module-lit, because that decision affects channel depth, wiring routes and the minimum stroke widths you can promise. A short annotated mock-up of one representative letter usually settles every question and prevents rework across the whole sign.
Recommended Products
Frequently Asked Questions
What is a split-type neon tube?
It is a neon sleeve made in two pieces or with an opening along its length so the LED strip can be laid in and the body clipped shut, instead of feeding the strip through a solid tube from one end. It is used for ultra-thin channel letters and tight logos that cannot be threaded.
When should I use a split tube instead of a solid one?
Use a split tube when the letter stroke is too narrow or the internal bends are too tight to thread a solid sleeve without kinking, or when the strip is already wired and must be sleeved in place. For normal-width strokes a solid tube is cheaper and quicker with no seam to seal.
Are split neon tubes waterproof?
They can be used outdoors, but because the body opens along its length the split line and end closures must be sealed with the recommended method. A solid tube is continuously sealed by default; a split tube's waterproofing depends on a clean, correctly sealed closure.
Why do I see a seam line after closing a split tube?
A visible seam usually means the two halves were not fully seated or the closure was snapped shut too quickly, leaving a gap. Re-open the section, centre the strip and press the halves together progressively along the run so the emitting face stays flush.
How thin can a channel letter be with a 0408 split tube?
The 0408 split profile is designed for very small strokes, but the exact minimum depends on the strip thickness, bend radius and room for wires. Send the artwork's minimum stroke width and a sample of the strip so the smallest buildable profile can be confirmed before fabrication.
Need help with your LED project?
Get factory-direct pricing, free samples and engineering support within 24 hours.
Email: info@arraystarled.com | Phone: +86-0755-2103-6746 | WhatsApp: 0086 1581 8514 077
Need to size your power supply? Use our LED Strip Power Calculator to find the right driver in seconds.







